Configuring the Consent Banner
How to configure the look, feel, and content of your consent banner.
Overview
Consent banners are required by many regulatory regimes to explicitly ask for user consent before deploying cookies or other tracking identifiers, or to notify the user that tracking technologies like cookies are being utilized. When fully complying with laws like GDPR, consent banners do not merely notify the user about the usage of cookies or other trackers on a website, but ask for express/explicit consent before setting non-essential identifiers or cookies (often referred to as strictly necessary cookies) on the user's browser. Depending upon the configuration settings, consent banners can also provide a quick means for users to choose their consent preferences.
User Experiences: Consent Banner
Setup and configure the consent banner that is shown to your users. To configure or update the Consent Banner, click on Privacy → User Experiences → Consent Banner to configure the banner.
Note: If you have multiple regions setup, select the region you want to configure from the Region drop-down selector in the top left of the page above the Consent Banner title.
How to Configure the Consent Banner - General Settings
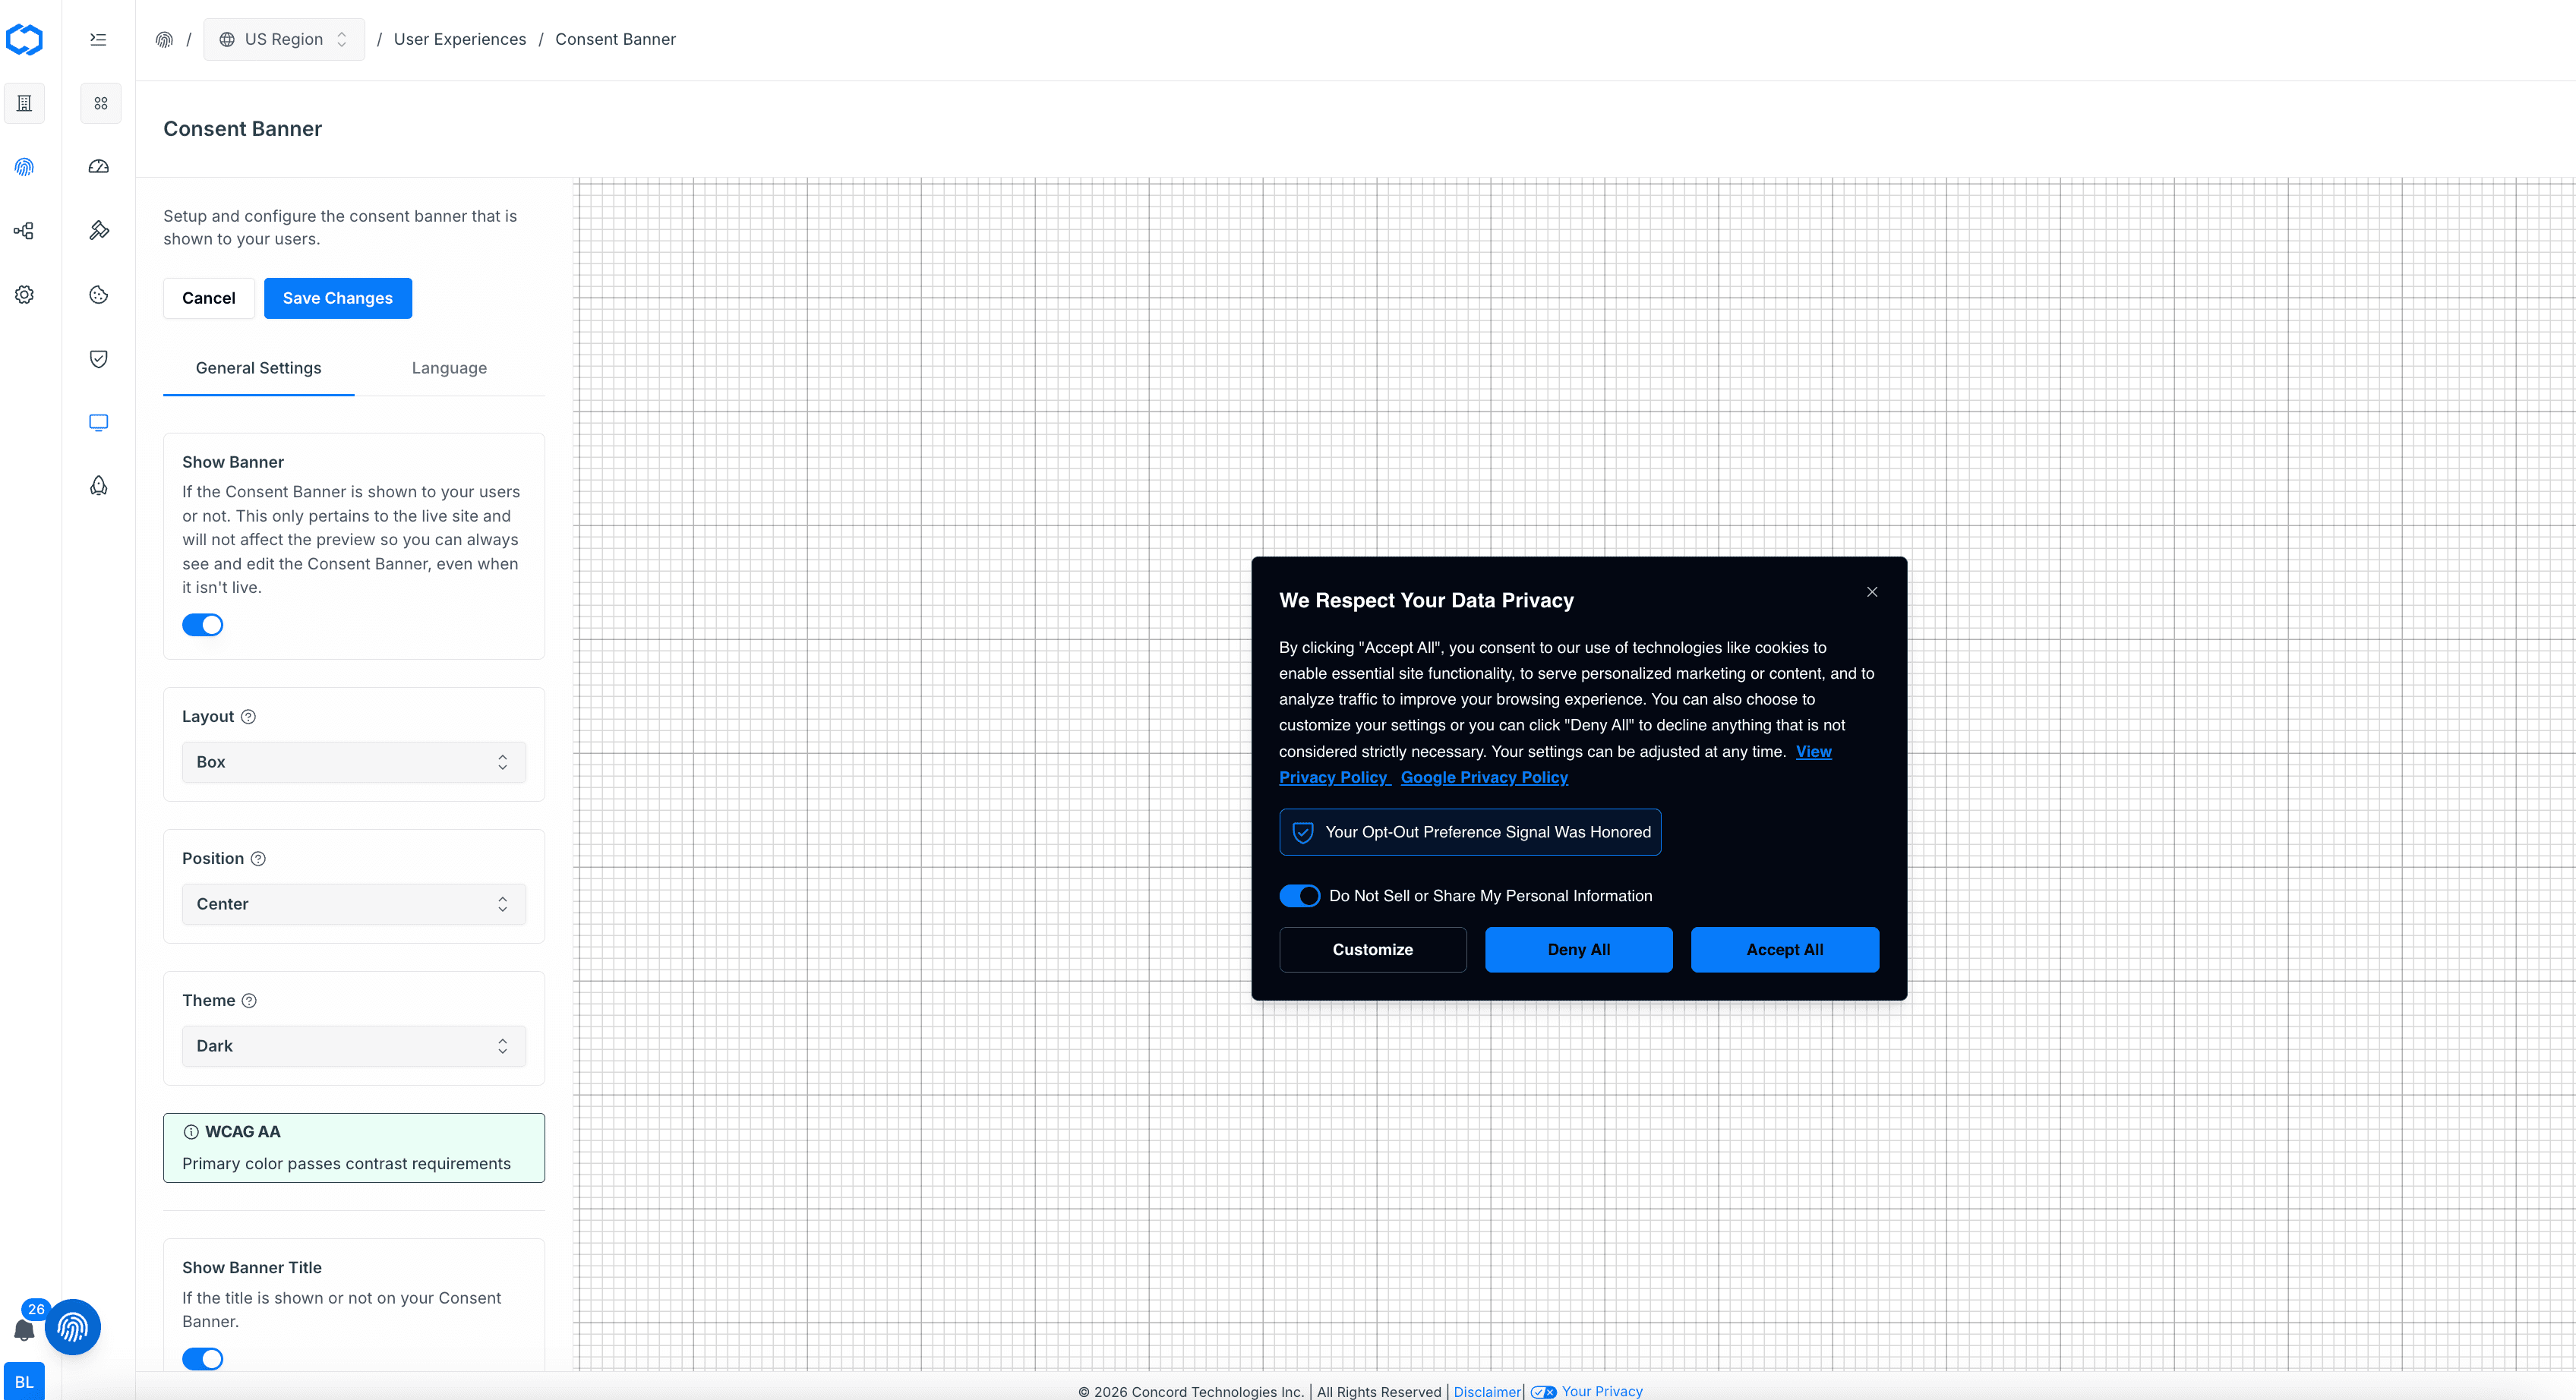
Login to Concord and navigate to Privacy → User Experiences → Consent Banner → General Setting tab. In this section, you can setup and configure how the consent banner is displayed to your users. In this section you can configure the following:
- Show Banner: If the Consent Banner is shown to your users or not. This only pertains to the live site and will not affect the preview so you can always see and edit the Consent Banner, even when it isn't live.
- Layout: The layout for your consent banner. Options: bar or box.
- Position: Where the Consent Banner appears on your page. Options: Center, Left Bottom, Left Top, Right Bottom, Right Top.
- Theme: The theme used for your Consent Banner. Can be set to brand, light, or dark. All themes use your primary color for most of your custom branding (buttons,links, etc.). Brand will use your secondary color as the background. Light uses a white background. Dark uses a very dark gray/black background.
- WCAG AA: WCAG AA is the internationally recognized standard for web accessibility, ensuring digital content is usable by people with disabilities. Contrast is adjusted to a minimum 4.5:1 ratio for text to background, ensuring readability for visually impaired users.
- Show Banner Title: Choose if the Deny button is shown or not on your Consent Banner.
- Show Customize Button: Choose ****If the Customize button is shown or not on your Consent Banner.
- Show Google Privacy Policy Link: When enabled, displays a link to Google's privacy policy in the consent banner. This is recommended when using Google Consent Mode.
Consent Banner: Language
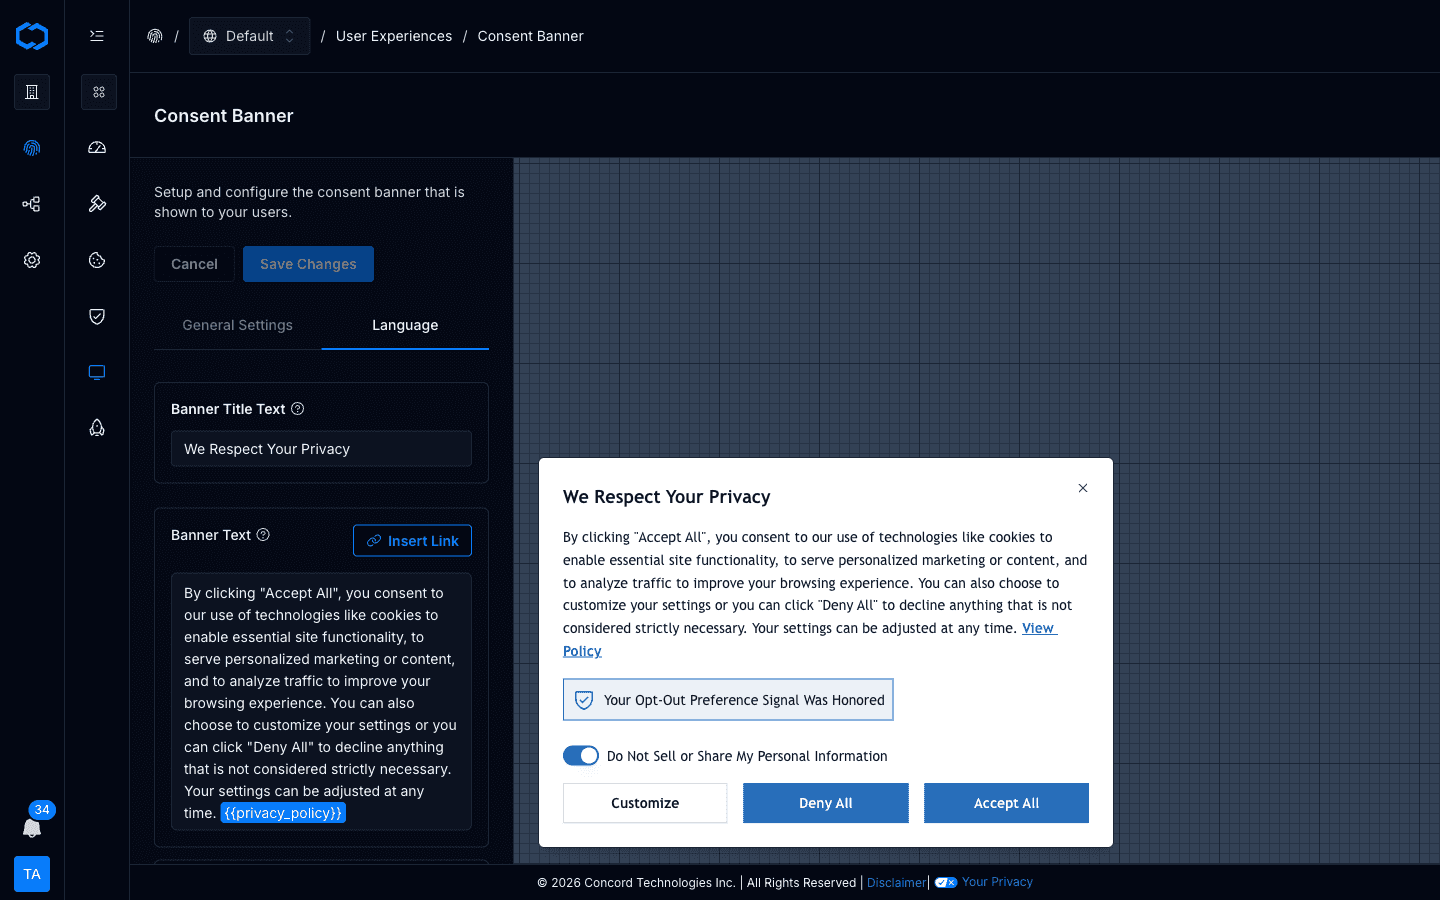
In the Privacy → User Experiences → Consent Banner → Language tab, you can setup and customize the verbiage displayed in your Privacy Center. Concord provides suggested text however, we also offer extensive customization options so you can change text to align with your business needs and language style. You can customized the following text in your company’s Privacy Center:
- Banner Title Text: The title text shown on your Consent Banner.
- Banner Text: The text shown on your Consent Banner. Supports inline Policy Link tokens — see Inserting Policy Links into banner text below.
- Accept Button Text: The Accept button text shown on your Consent Banner.
- Deny Button Text: The Deny button text shown on your Consent Banner.
- Customize Button Text: The Customize button text shown on your Consent Banner.
Once you’ve updated the banner configuration options, click Save Changes to save your changes.
Inserting Policy Links into Banner Text
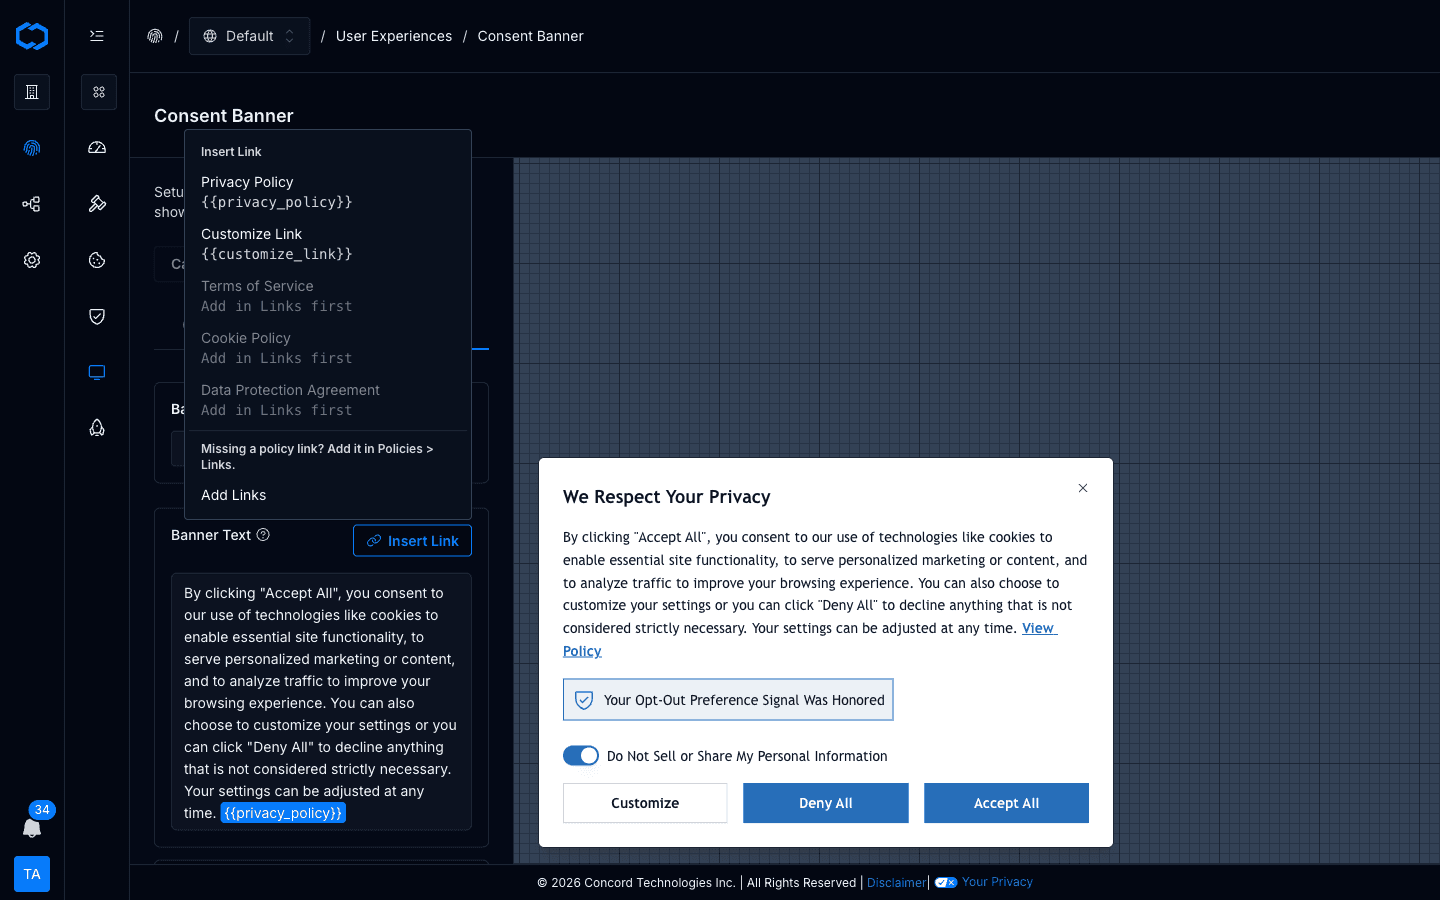
The Banner Text field is a rich text editor. To link to your Privacy Policy, Terms of Service, Cookie Policy, Data Protection Agreement, or any custom policy, insert a Policy Link token rather than pasting a URL:
- Place the cursor where the link should appear in your banner text.
- Click Insert Link in the text editor toolbar.
- Pick the Policy Link you want to embed. The menu lists every Policy Link configured under Policies → Links.
- Optionally override the displayed text for this banner and language — the default is the Policy Link's Name.
Tokens render inline with the banner copy and resolve to the Policy Link's URL at runtime. If you update the destination URL later under Policies → Links, every banner that embeds that token picks up the change automatically — you don't re-edit the banner.
For the list of built-in policy types, the create/edit flow, and how tokens behave when a Policy Link is deleted, see Managing Policy Links.