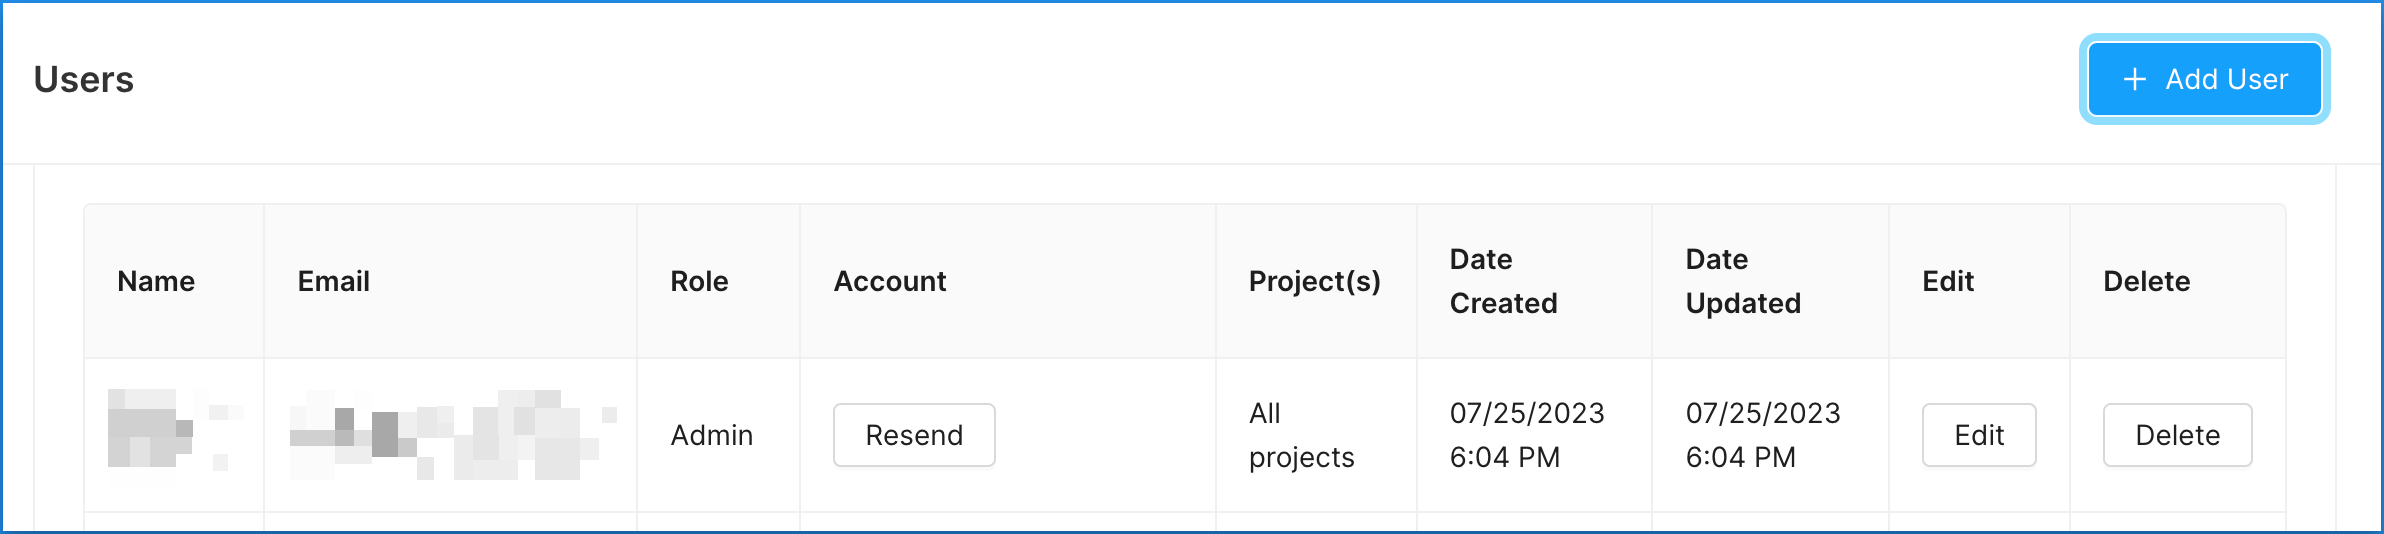
Managing Users
You can add, edit, and delete Concord users from the Users section under Global Settings.
Adding Users
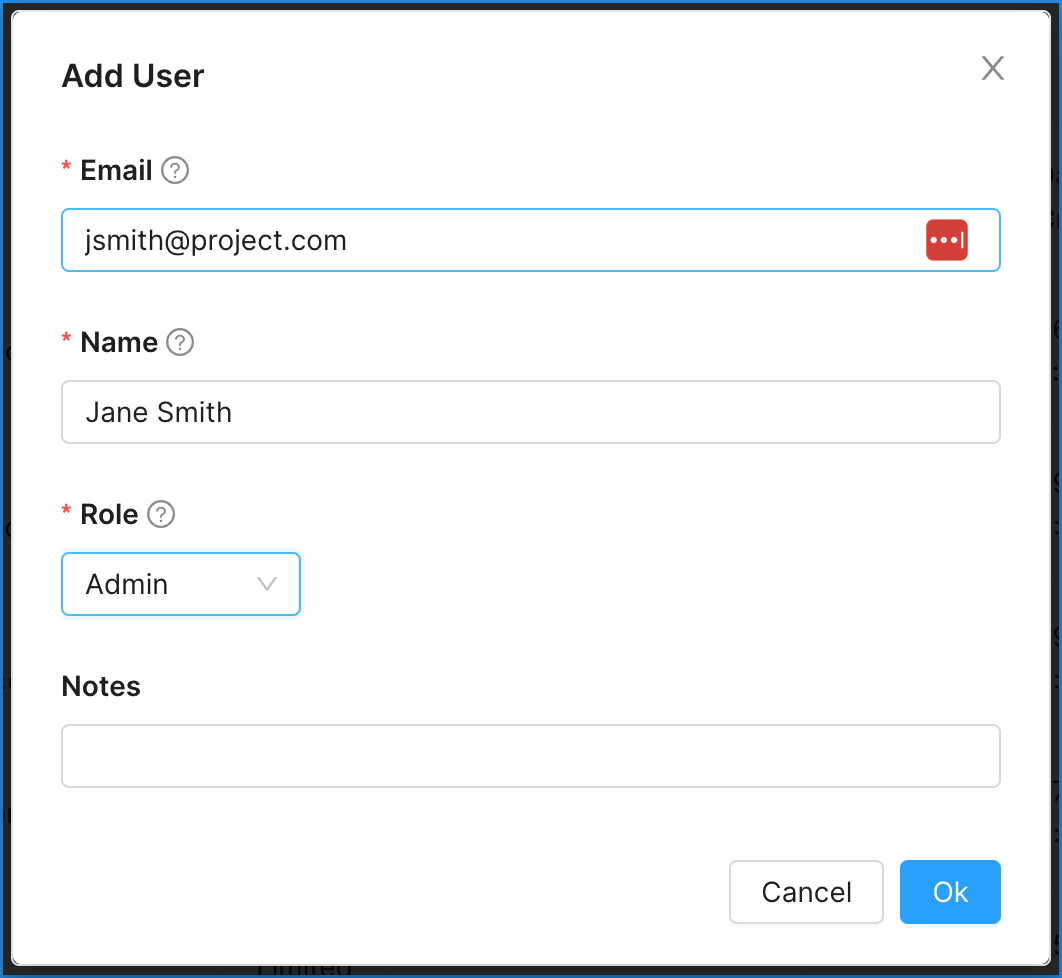
To add a user, click on the + Add User button on the top right.
- Add an email address. This is the address where email notifications will be sent, so ensure this is accurate.
- Add a name.
- Select a role. Currently, you may choose between Admin and Limited. Admin has full rights to everything in an Organization. Limited has read only rights to all projects plus the ability to edit individual compliance requests.
- Add any additional notes for this user.
See also: User Roles & Permissions
Confirming User Accounts
New users must first confirm their account to access projects. When initially added in the Admin UI, users will receive an email invitation to join your organization. The user will need to follow the provided link to confirm their account.
- To resend the invite link to a user, click Resend next to their pending account.
Editing Users
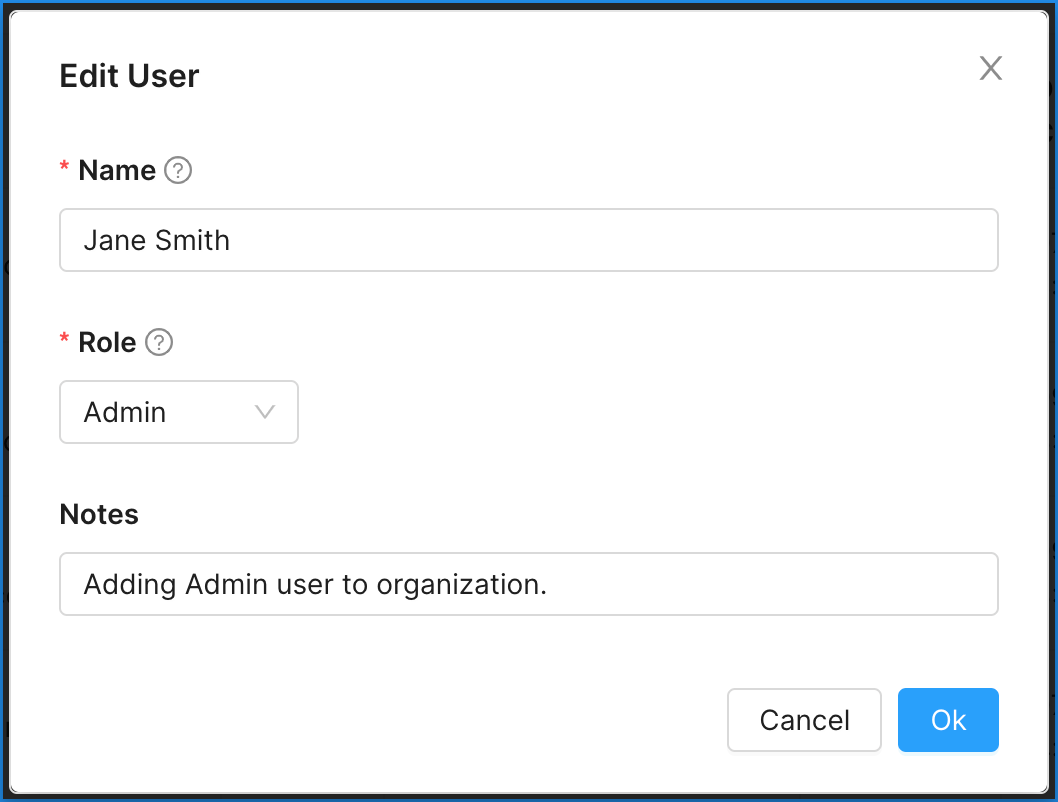
To edit a user, click on the Edit button to the right of the row displaying the user’s information.
- You can edit the user name, role, and user notes from here.
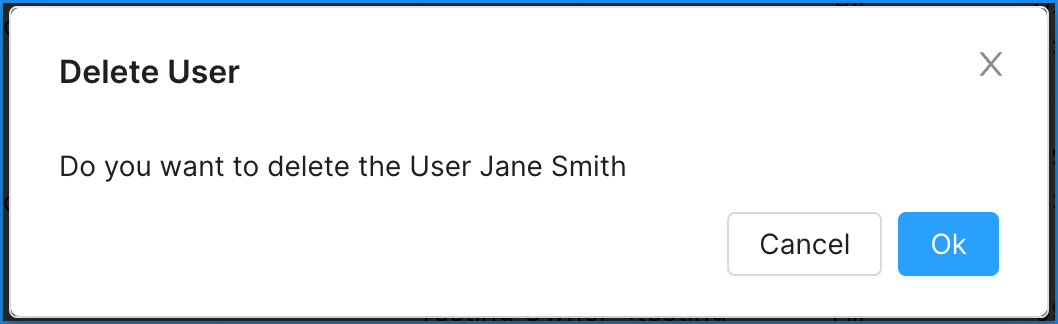
Deleting Users
To delete a user, click the Delete button to the right of the row displaying that user’s information. You will be asked to confirm the user deletion.