Adding & Managing Documents
How to add and manage documents in the Data Hub for use in your Concord Trust Center, including statements, FAQs, links, reports, and policies.
Overview
Documents in Concord are managed through the Data Hub → Documents area in the Admin UI, which serves as a shared global library across your organization. Documents you add here including statements, FAQs, reports, policies, and links can then be featured on your Trust Center for prospects, customers, and partners to review.
Document Types
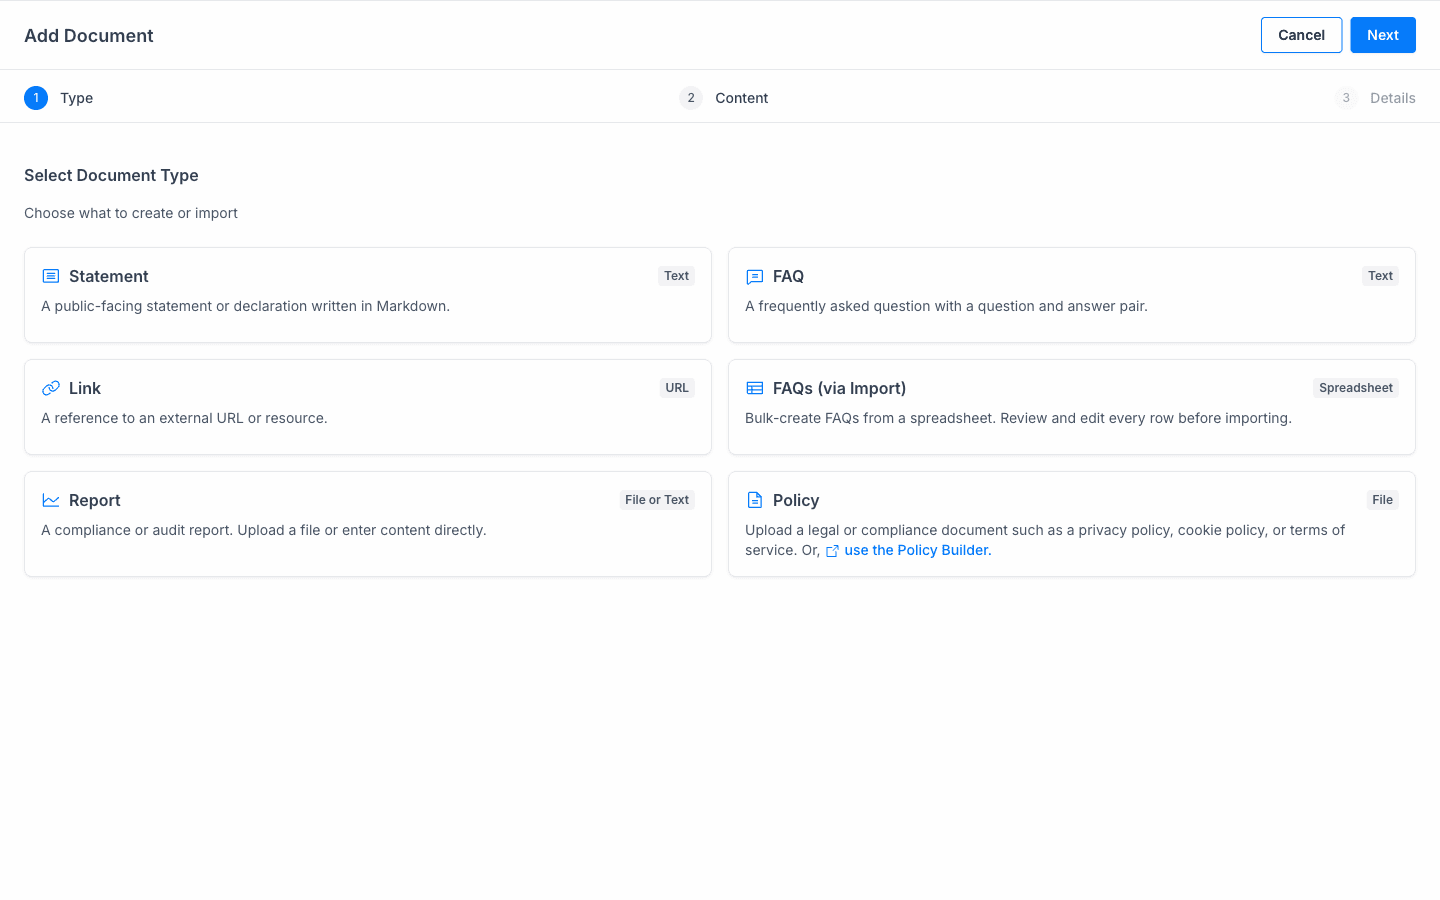
When you add a document, you first select a document type. Each type has a different content format:
| Type | Format | Description |
|---|---|---|
| Statement | Text | A public-facing statement or declaration written in Markdown. |
| FAQ | Text | A frequently asked question with a question and answer pair. |
| Link | URL | A reference to an external URL or resource. |
| FAQs (via Import) | Spreadsheet | Bulk-create FAQs from a spreadsheet. Review and edit every row before importing. |
| Report | File or Text | A compliance or audit report. Upload a file or enter content directly. |
| Policy | File | A legal or compliance document such as a privacy policy, cookie policy, or terms of service. You can also use the Policy Builder. |
Adding a Document
The Add Document flow is a three-step wizard: Type → Content → Details.
Step 1: Select Document Type
- In the Concord Admin UI, go to Data Hub → Documents.
- Click the ** Add Document** button.
- Select the document type that matches what you want to add (Statement, FAQ, Link, Report, or Policy).
- Click Next.
Step 2: Add Content
The content step varies by document type:
- Statement: write your statement content in Markdown.
- FAQ: enter the question and answer.
- Link: enter the external URL.
- FAQs (via Import): upload a spreadsheet file. Review and edit each row before importing.
- Report: upload a file or enter the report content directly as text.
- Policy: upload a policy file, or use the Policy Builder to create one.
Click Next when your content is ready.
Step 3: Configure Details
Configure the document metadata:
- Name: a display name for the document.
- Description: a description of the document.
- Category: the category the document belongs to.
- Access Level: controls who can see this document when it is featured on your Trust Center.
Click Save. The document is now in your global document library and is automatically published as version 1.
Featuring Documents on Your Trust Center
Adding a document to the Data Hub makes it available in your global library. To display it on your Trust Center for customers and prospects:
- Go to Trust → Resources.
- Select which documents from your global library to include on this Trust Center.
- Included documents appear on your Trust Center according to their access level setting.
This two-step approach (add globally, then include selectively) lets you maintain a complete document library while controlling exactly what external visitors see. See Managing Your Trust Center Resources for the full walkthrough.
Viewing and Filtering Documents
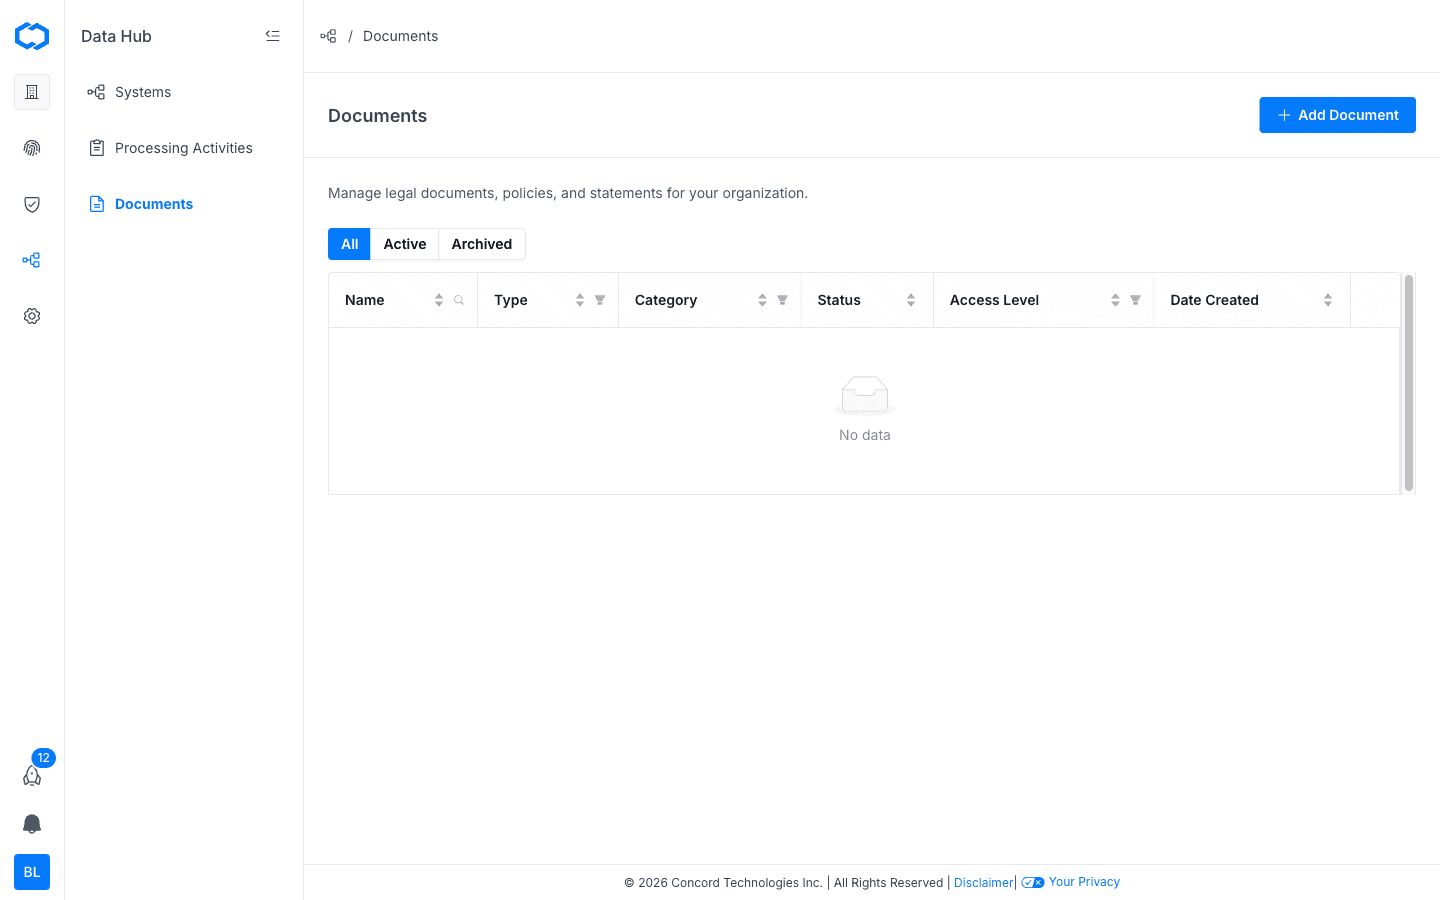
The Documents table in Data Hub → Documents shows all documents in your library with the following columns:
- Name: the document name.
- Type: the document type (Statement, FAQ, Link, Report, or Policy).
- Category: the document category.
- Status: Active or Archived.
- Access Level: who can access the document.
- Date Created: when the document was added.
Use the All, Active, and Archived tabs to filter by status. You can also sort and filter individual columns.
Live Policy Sync
If you use Concord Privacy for policy management, your policies can be displayed on your Trust Center automatically through the shared Data Hub. When you update a policy in Concord Privacy (such as your Privacy Policy or Cookie Policy), the Trust Center reflects the current version without any manual re-upload.
Synced policies appear alongside your other documents in the Trust Center. This means your visitors always see the latest version.
Editing a Document
- Go to Data Hub → Documents.
- Click the name of the document you want to edit.
This opens the document's detail view, which has three tabs: Content, Settings, and History. The header shows the document's current version (e.g., v1) and status (Published or Draft).
Content Tab
The Content tab is where you edit the document's actual content — the same editor used when you first added the document.
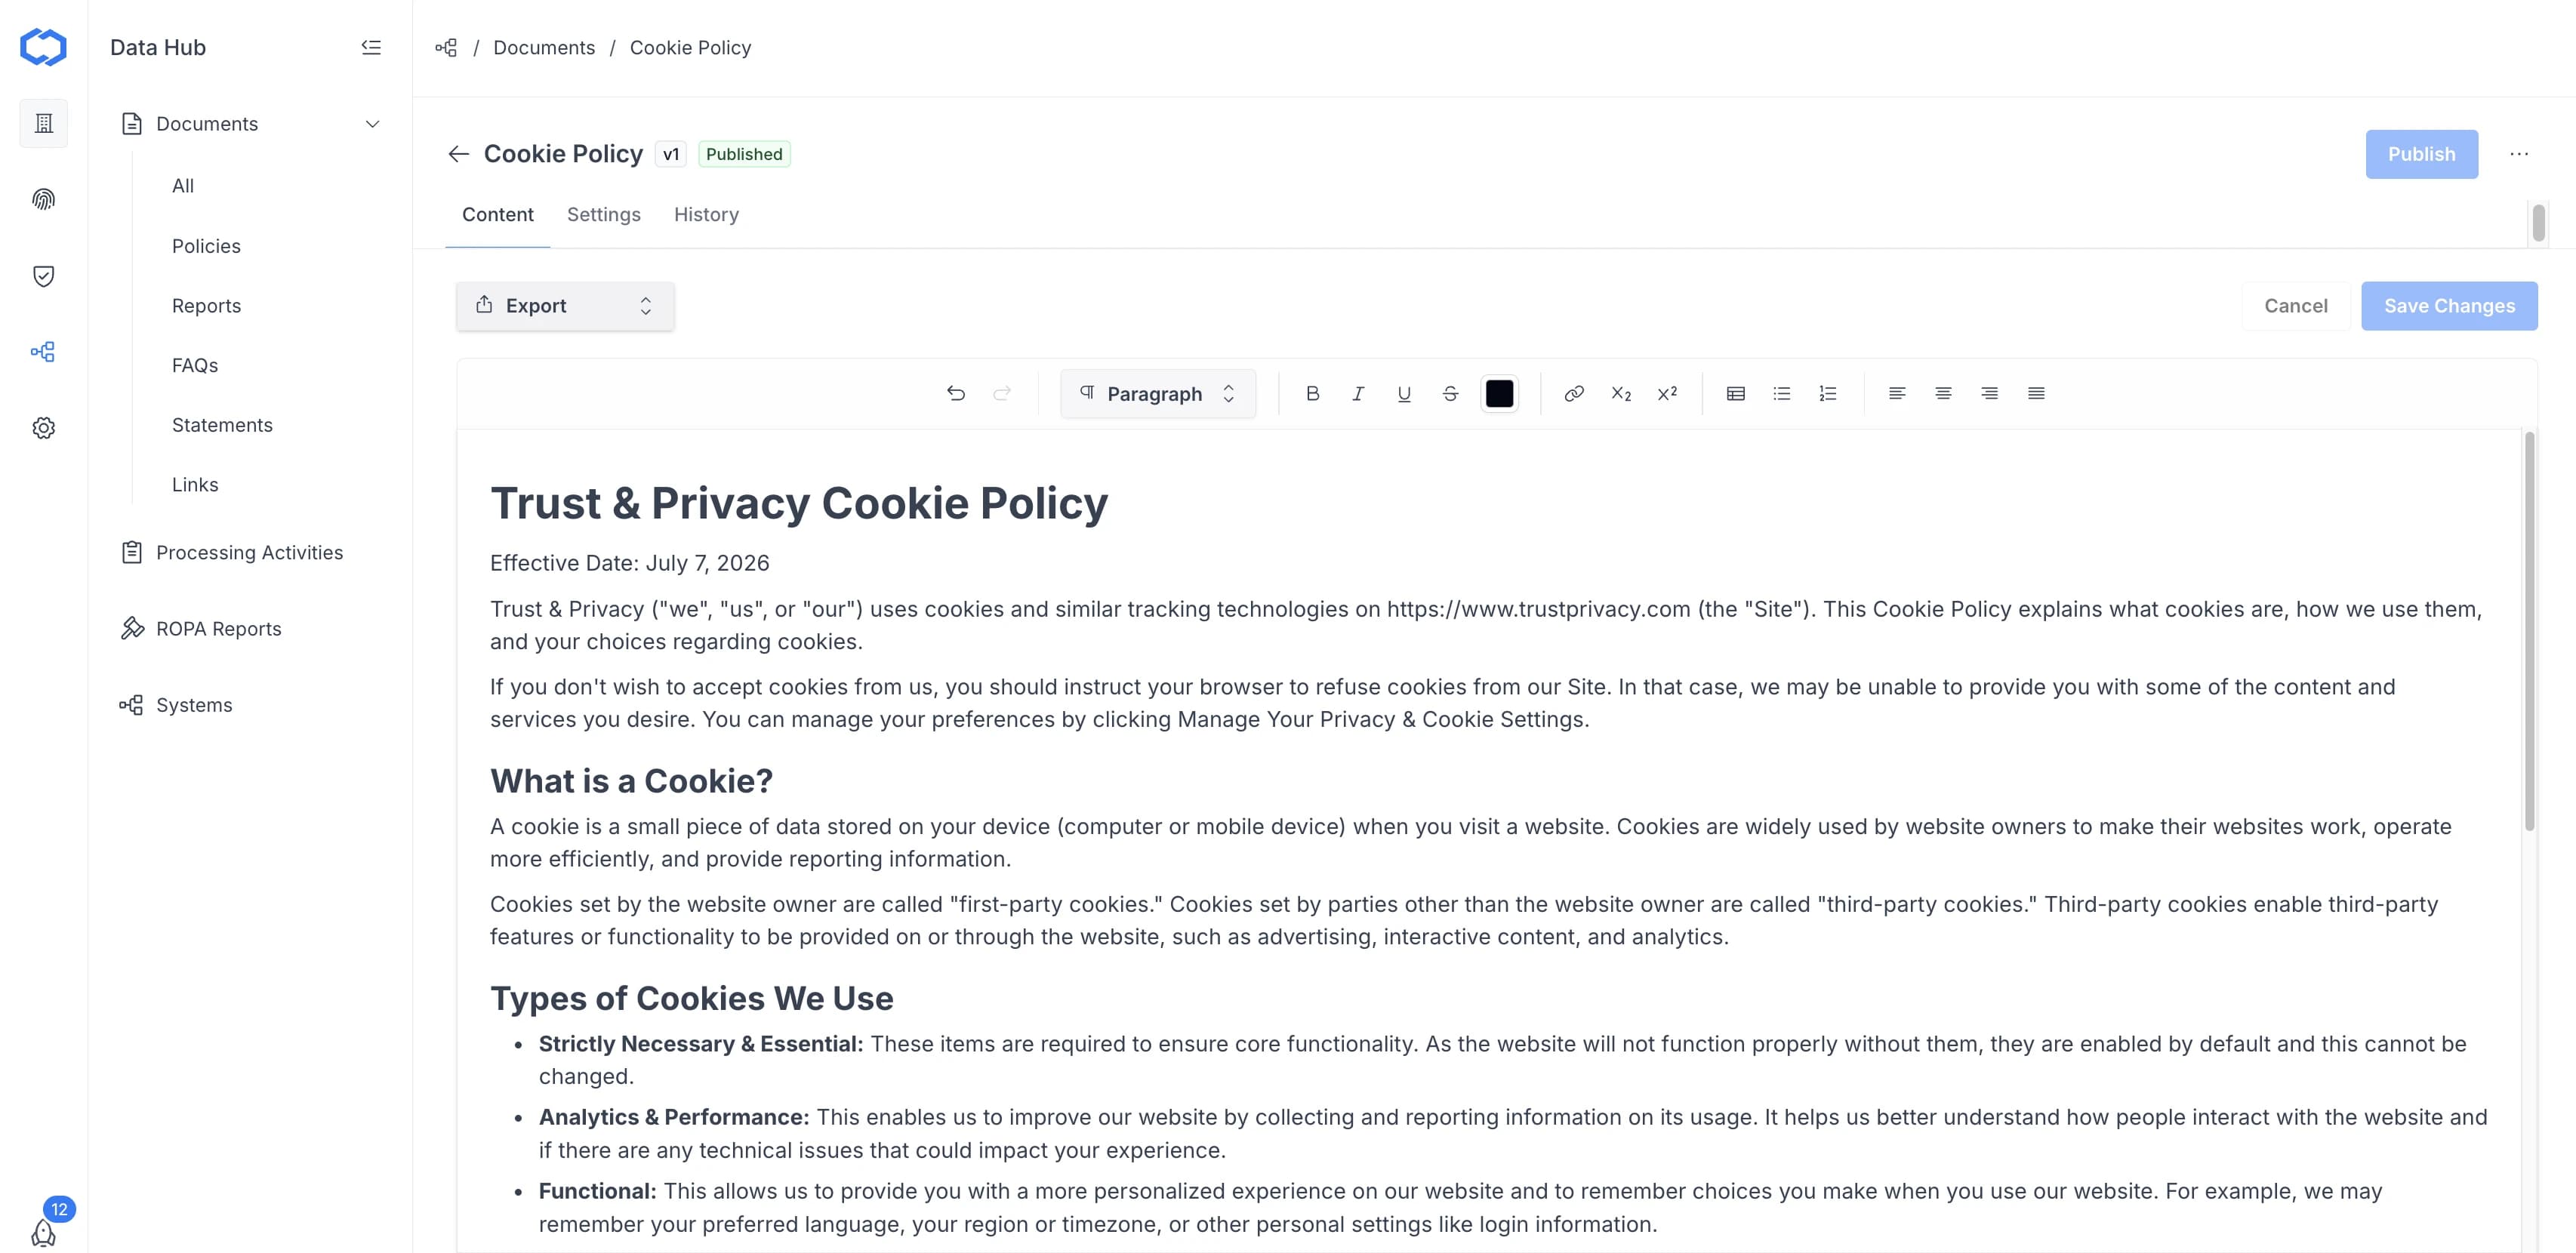
- Use the Export dropdown to export the document if needed.
- Edit the content using the rich text toolbar (formatting, links, lists, alignment, tables).
- Click Save Changes, or Cancel to discard your edits.
Saving your changes updates the draft but does not change what's live on your Trust Center — see Publishing Changes below.
Settings Tab
The Settings tab shows the document's metadata and lets you edit its name, description, and access level.
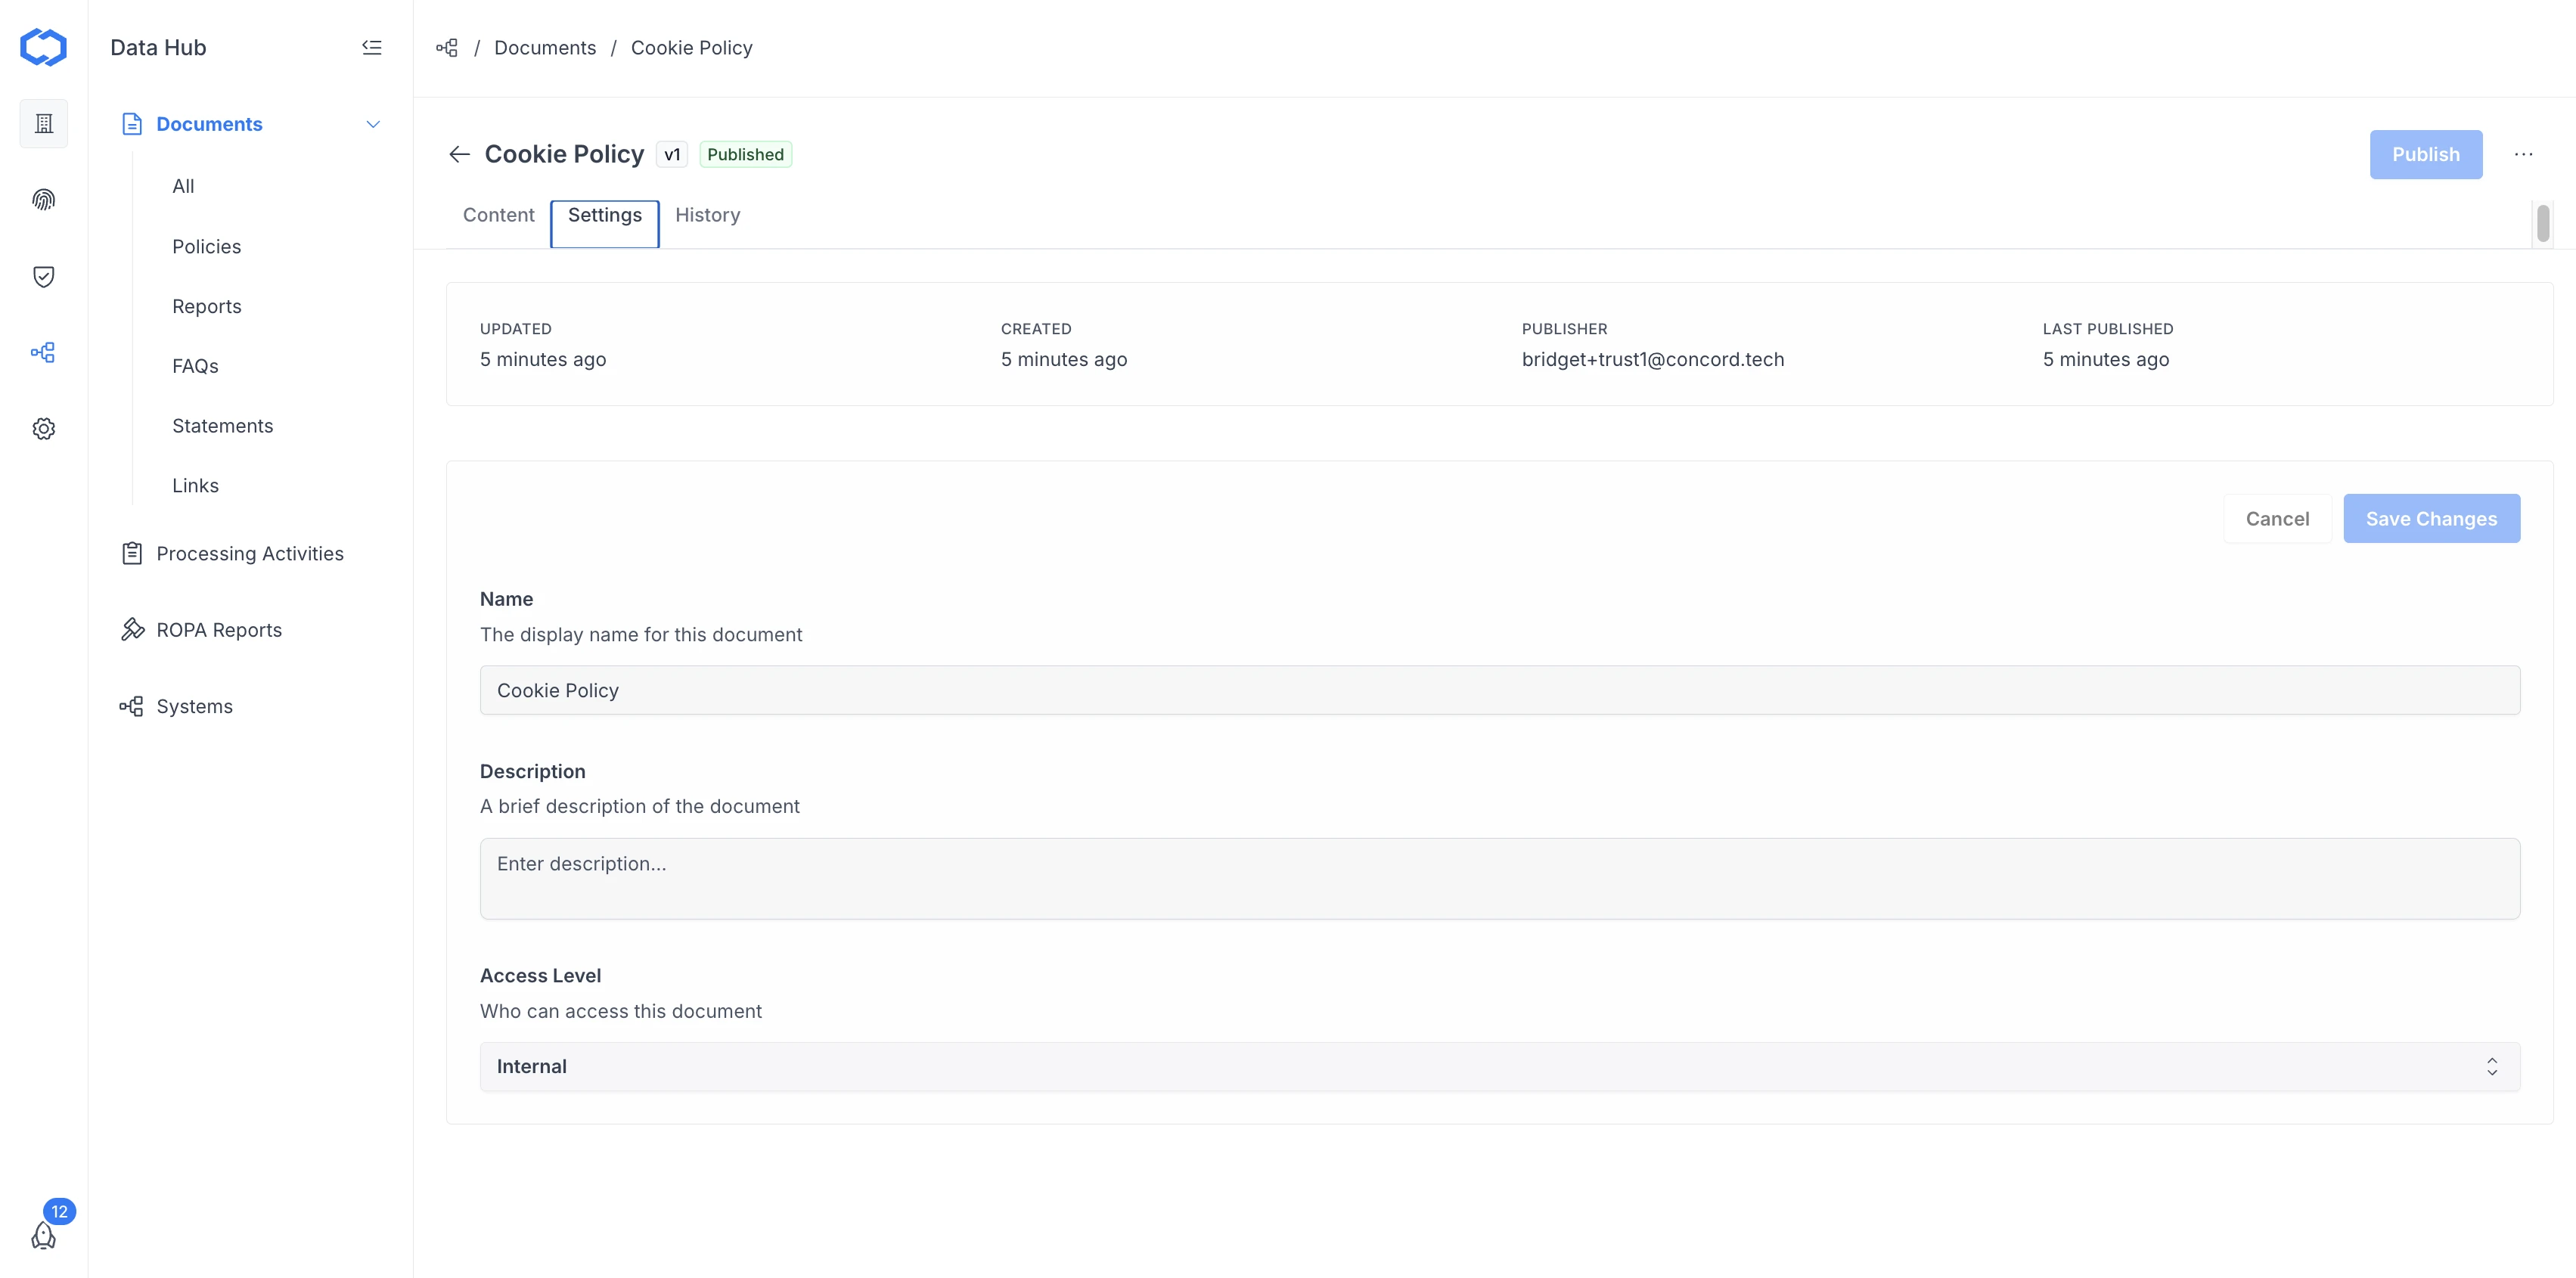
The top of the tab shows read-only metadata: Updated, Created, Publisher, and Last Published. Below that, you can edit:
- Name: the display name for this document.
- Description: a brief description of the document.
- Access Level: who can access this document (e.g., Internal).
Click Save Changes to save your edits, or Cancel to discard them.
History Tab
The History tab shows the document's version history.
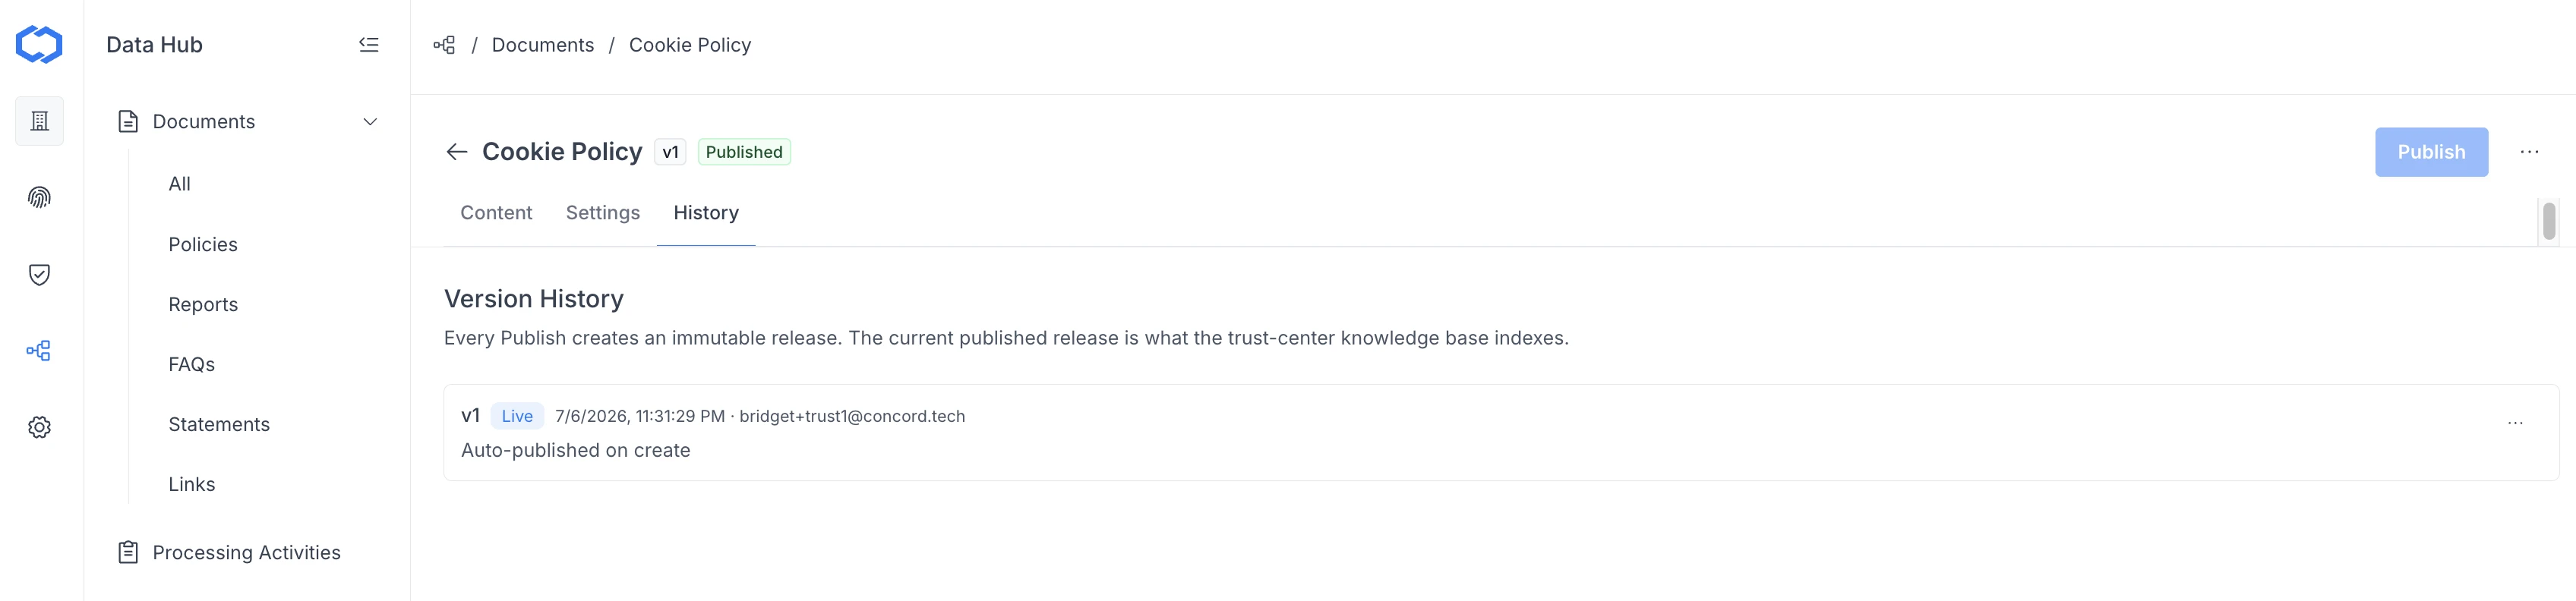
Every time you publish, Concord creates a new, immutable version (v1, v2, and so on). Each entry in the list shows the version number, a Live badge on the currently published version, the timestamp and publisher, and a short note about the change (for example, "Auto-published on create").
The current Live version is what your Trust Center Knowledge Base indexes for AI-generated answers — older versions are kept for reference but are not used by the AI or shown to visitors.
Publishing Changes
Editing the Content or Settings tab and clicking Save Changes updates your draft, but visitors and the Knowledge Base still see the last published version until you publish again.
- From any tab in the document's detail view, click Publish in the upper right corner.
- Concord creates a new immutable version and marks it Live.
Newly created documents are automatically published as version 1, so you only need this step when editing an existing document.
Archiving a Document
Archiving removes a document from your active library and from your Trust Center without permanently deleting it.
- Open the document you want to archive.
- Click the Actions menu (...) next to the Publish button.

- Select Archive.
Archived documents can be found using the Archived filter on the Documents table.
Deleting a Document
- Open the document you want to delete.
- Click the Actions menu (...) next to the Publish button.
- Select Delete and confirm.
Deleting a document removes it from your global library and from your Trust Center if it was featured. This action cannot be undone — if you might need the document again, archive it instead.
Related Articles
Managing Your Trust Center Resources
How to select which documents from your central document library are included on a specific Trust Center, and quick-edit their type and access level.
Managing FAQs
How to add, edit, and manage FAQ documents in the Data Hub for your Concord Trust Center, including individual FAQs and bulk import from a spreadsheet.