Data Hub: Systems
How to add, view, edit, archive, and delete data systems in the Concord Data Hub.
Overview
The Data Hub > Systems page is where you catalog the technology systems your organization uses. Adding your data systems gives you a structured inventory of the vendors, tools, and internal applications in your environment, which is foundational to demonstrating your security and compliance posture.
Systems you add in the Data Hub can be referenced across Concord as part of your compliance documentation, vendor management program, and privacy request fulfillment.
Viewing Your Data Systems
- In the Concord Admin UI, go to Data Hub > Systems.
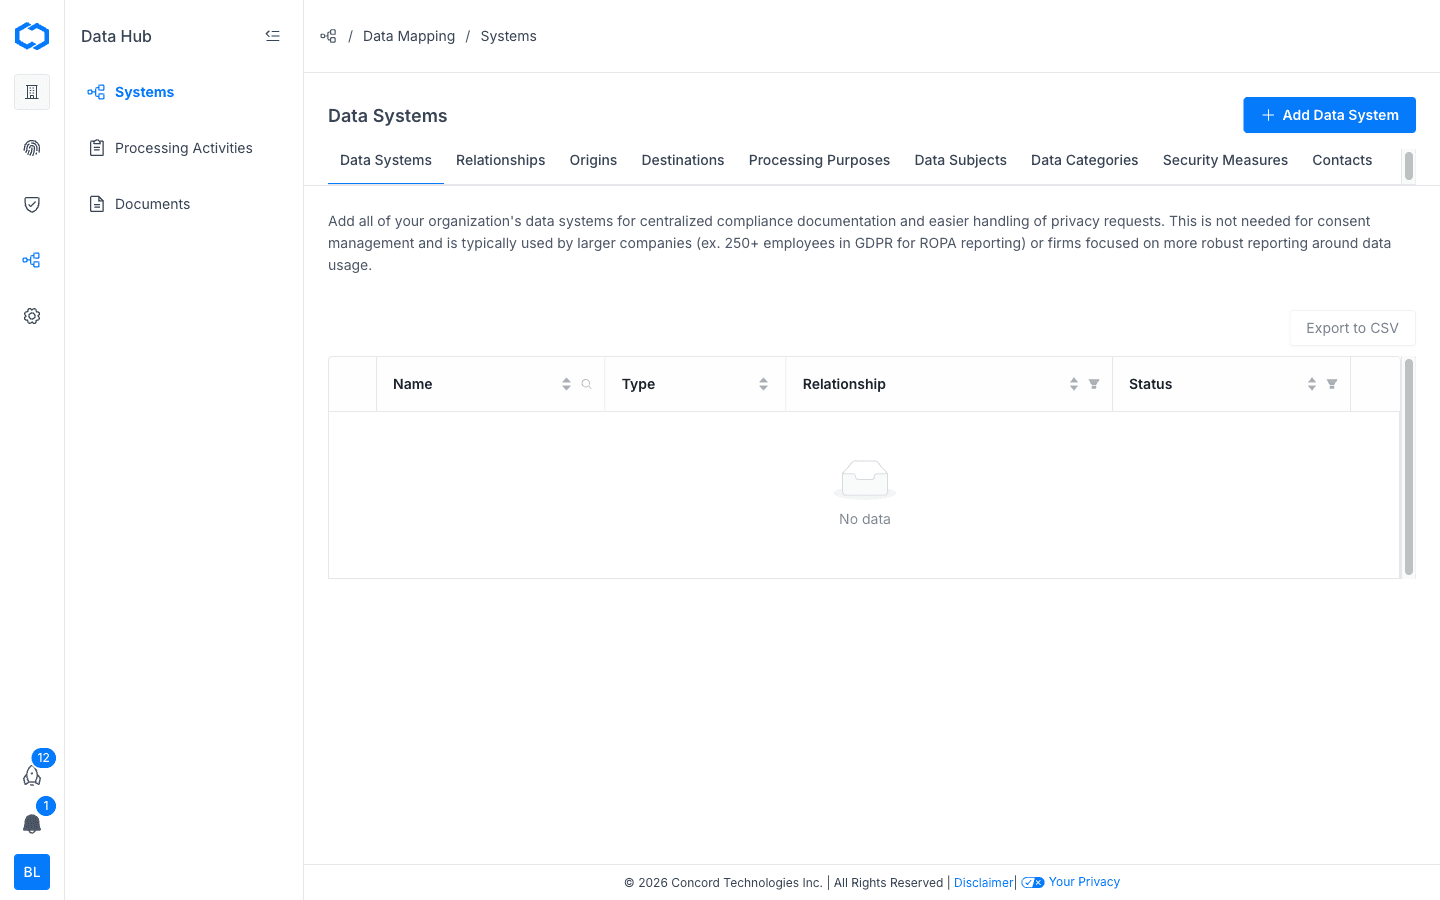
The Systems table shows all data systems in your organization with the following columns:
| Column | Description |
|---|---|
| Name | The display name of the system. |
| Type | The category of system (e.g., CRM, Cloud Storage, HR). |
| Relationship | Your organization's relationship to this system (Controller, Processor, etc.). |
| Status | Active, Test, or Archived. |
| Actions | Options to edit, archive, or delete the system. |
Click the + icon to the left of any row to expand it and see additional details such as the Data System ID, Origins, Destinations, Processing Purposes, Data Categories, Security Measures, Contacts, and more.
Click the system name to open the full detail view.
Adding a Data System
- Go to Data Hub > Systems.
- Click Add Data System in the upper right corner.

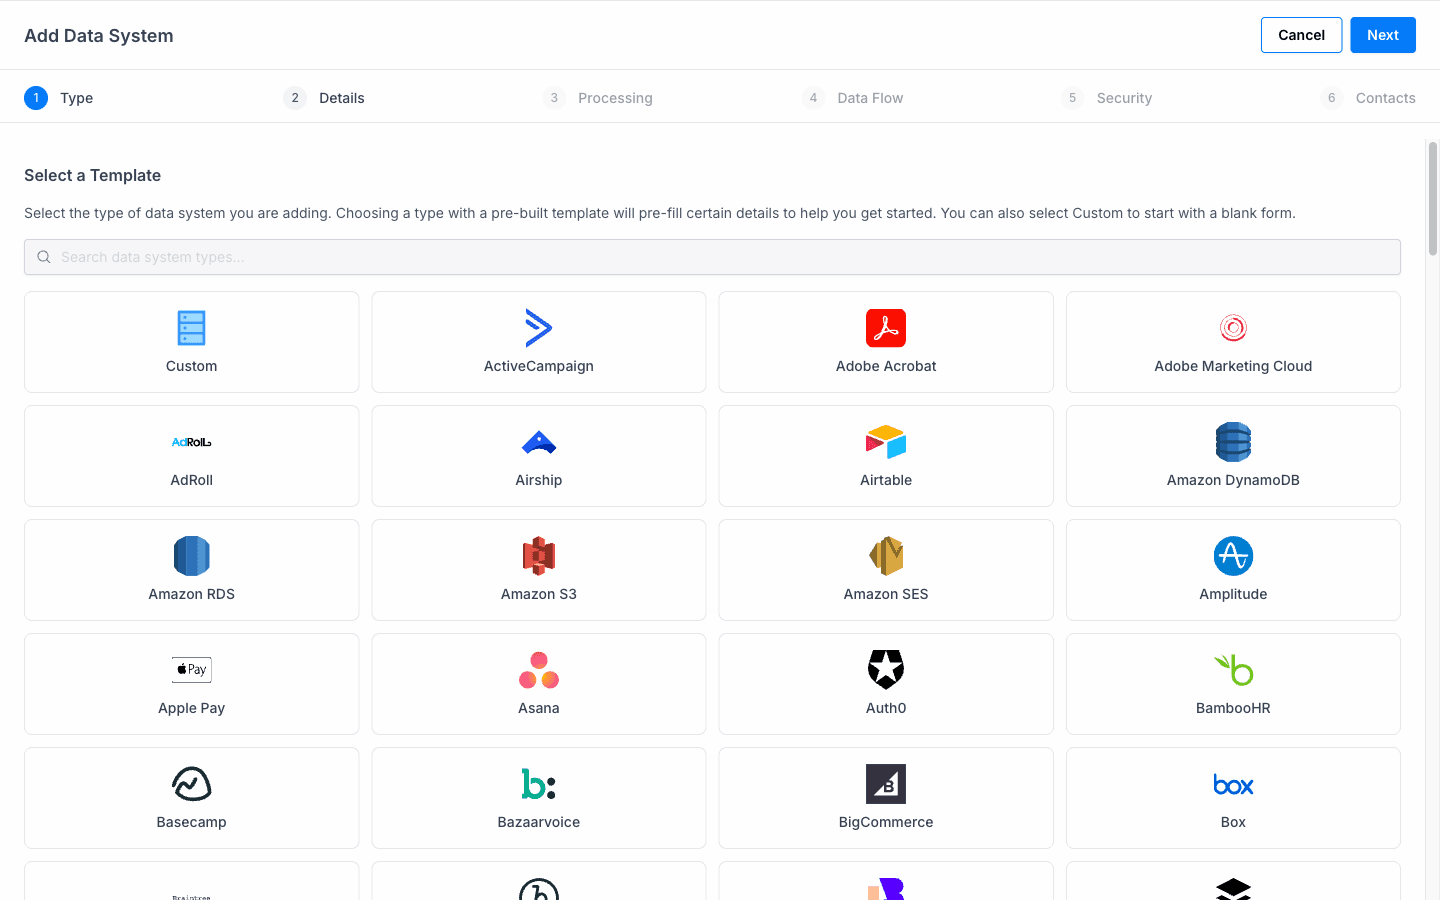
- Select the system type. Start typing to search, or scroll to browse available system types. Concord provides 100+ pre-built templates. If your system is not listed, select Custom.
- Click Next and fill in the system details:
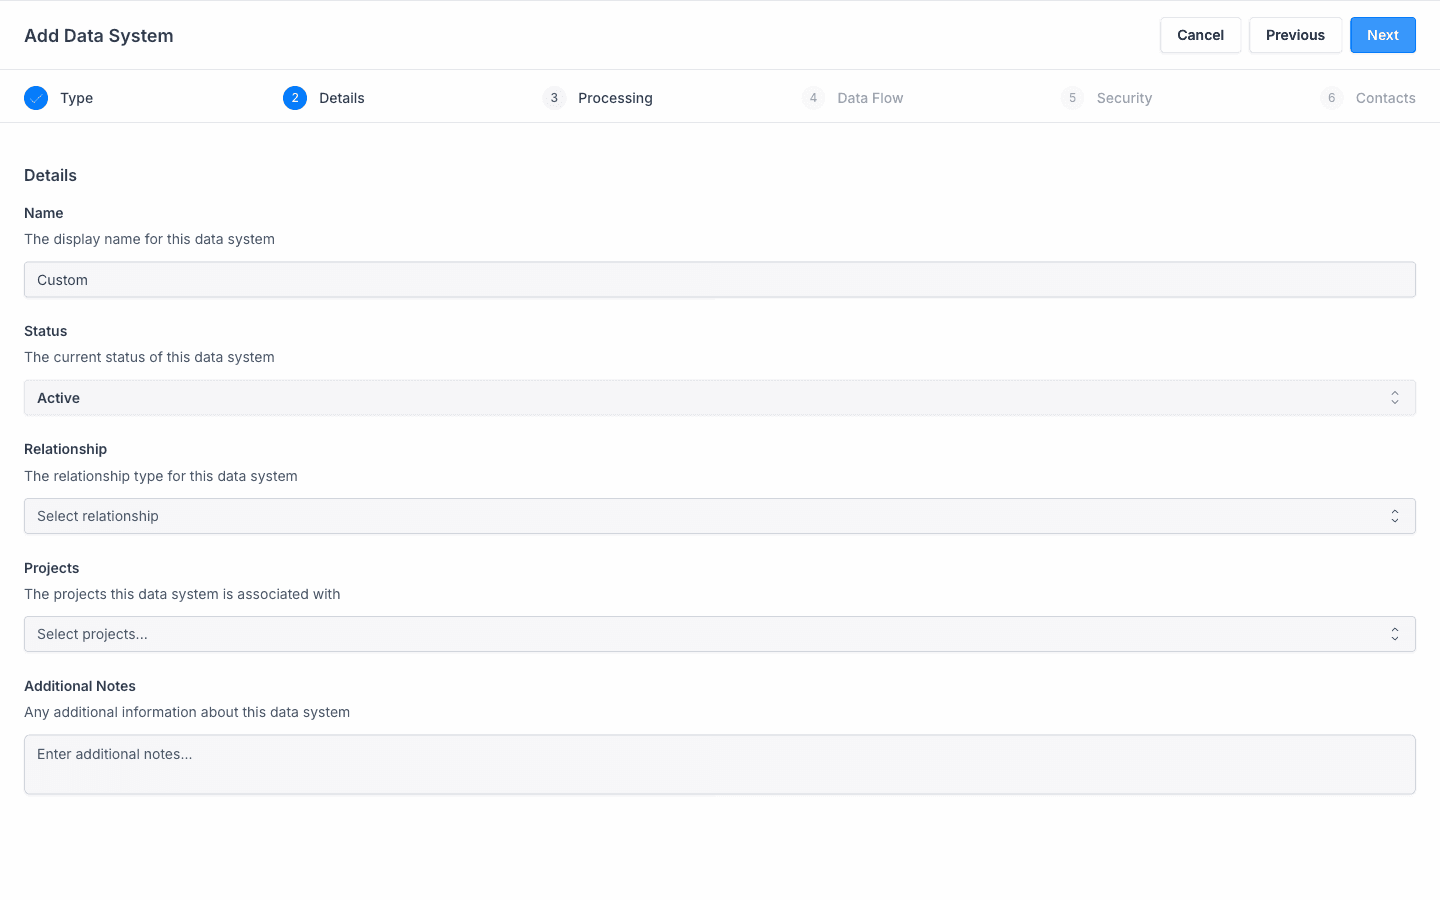
- Name: The display name for the system in Concord.
- Status: Set to Active, Test, or Archived.
- Relationship: Your organization's role with respect to this system:
- Controller: Your organization determines the purpose and means of processing data in this system.
- Processor: This system processes data on behalf of a controller (e.g., a SaaS vendor). Internally managed systems are usually a Controller; external SaaS products are usually a Processor.
- Joint Controller: Two or more parties jointly determine how data is processed.
- Sub-Processor: A third party engaged by a processor who also accesses the data.
- Projects: Associate this system with one or more of your Concord projects.
- Additional Notes: Any context about this system you want to record.
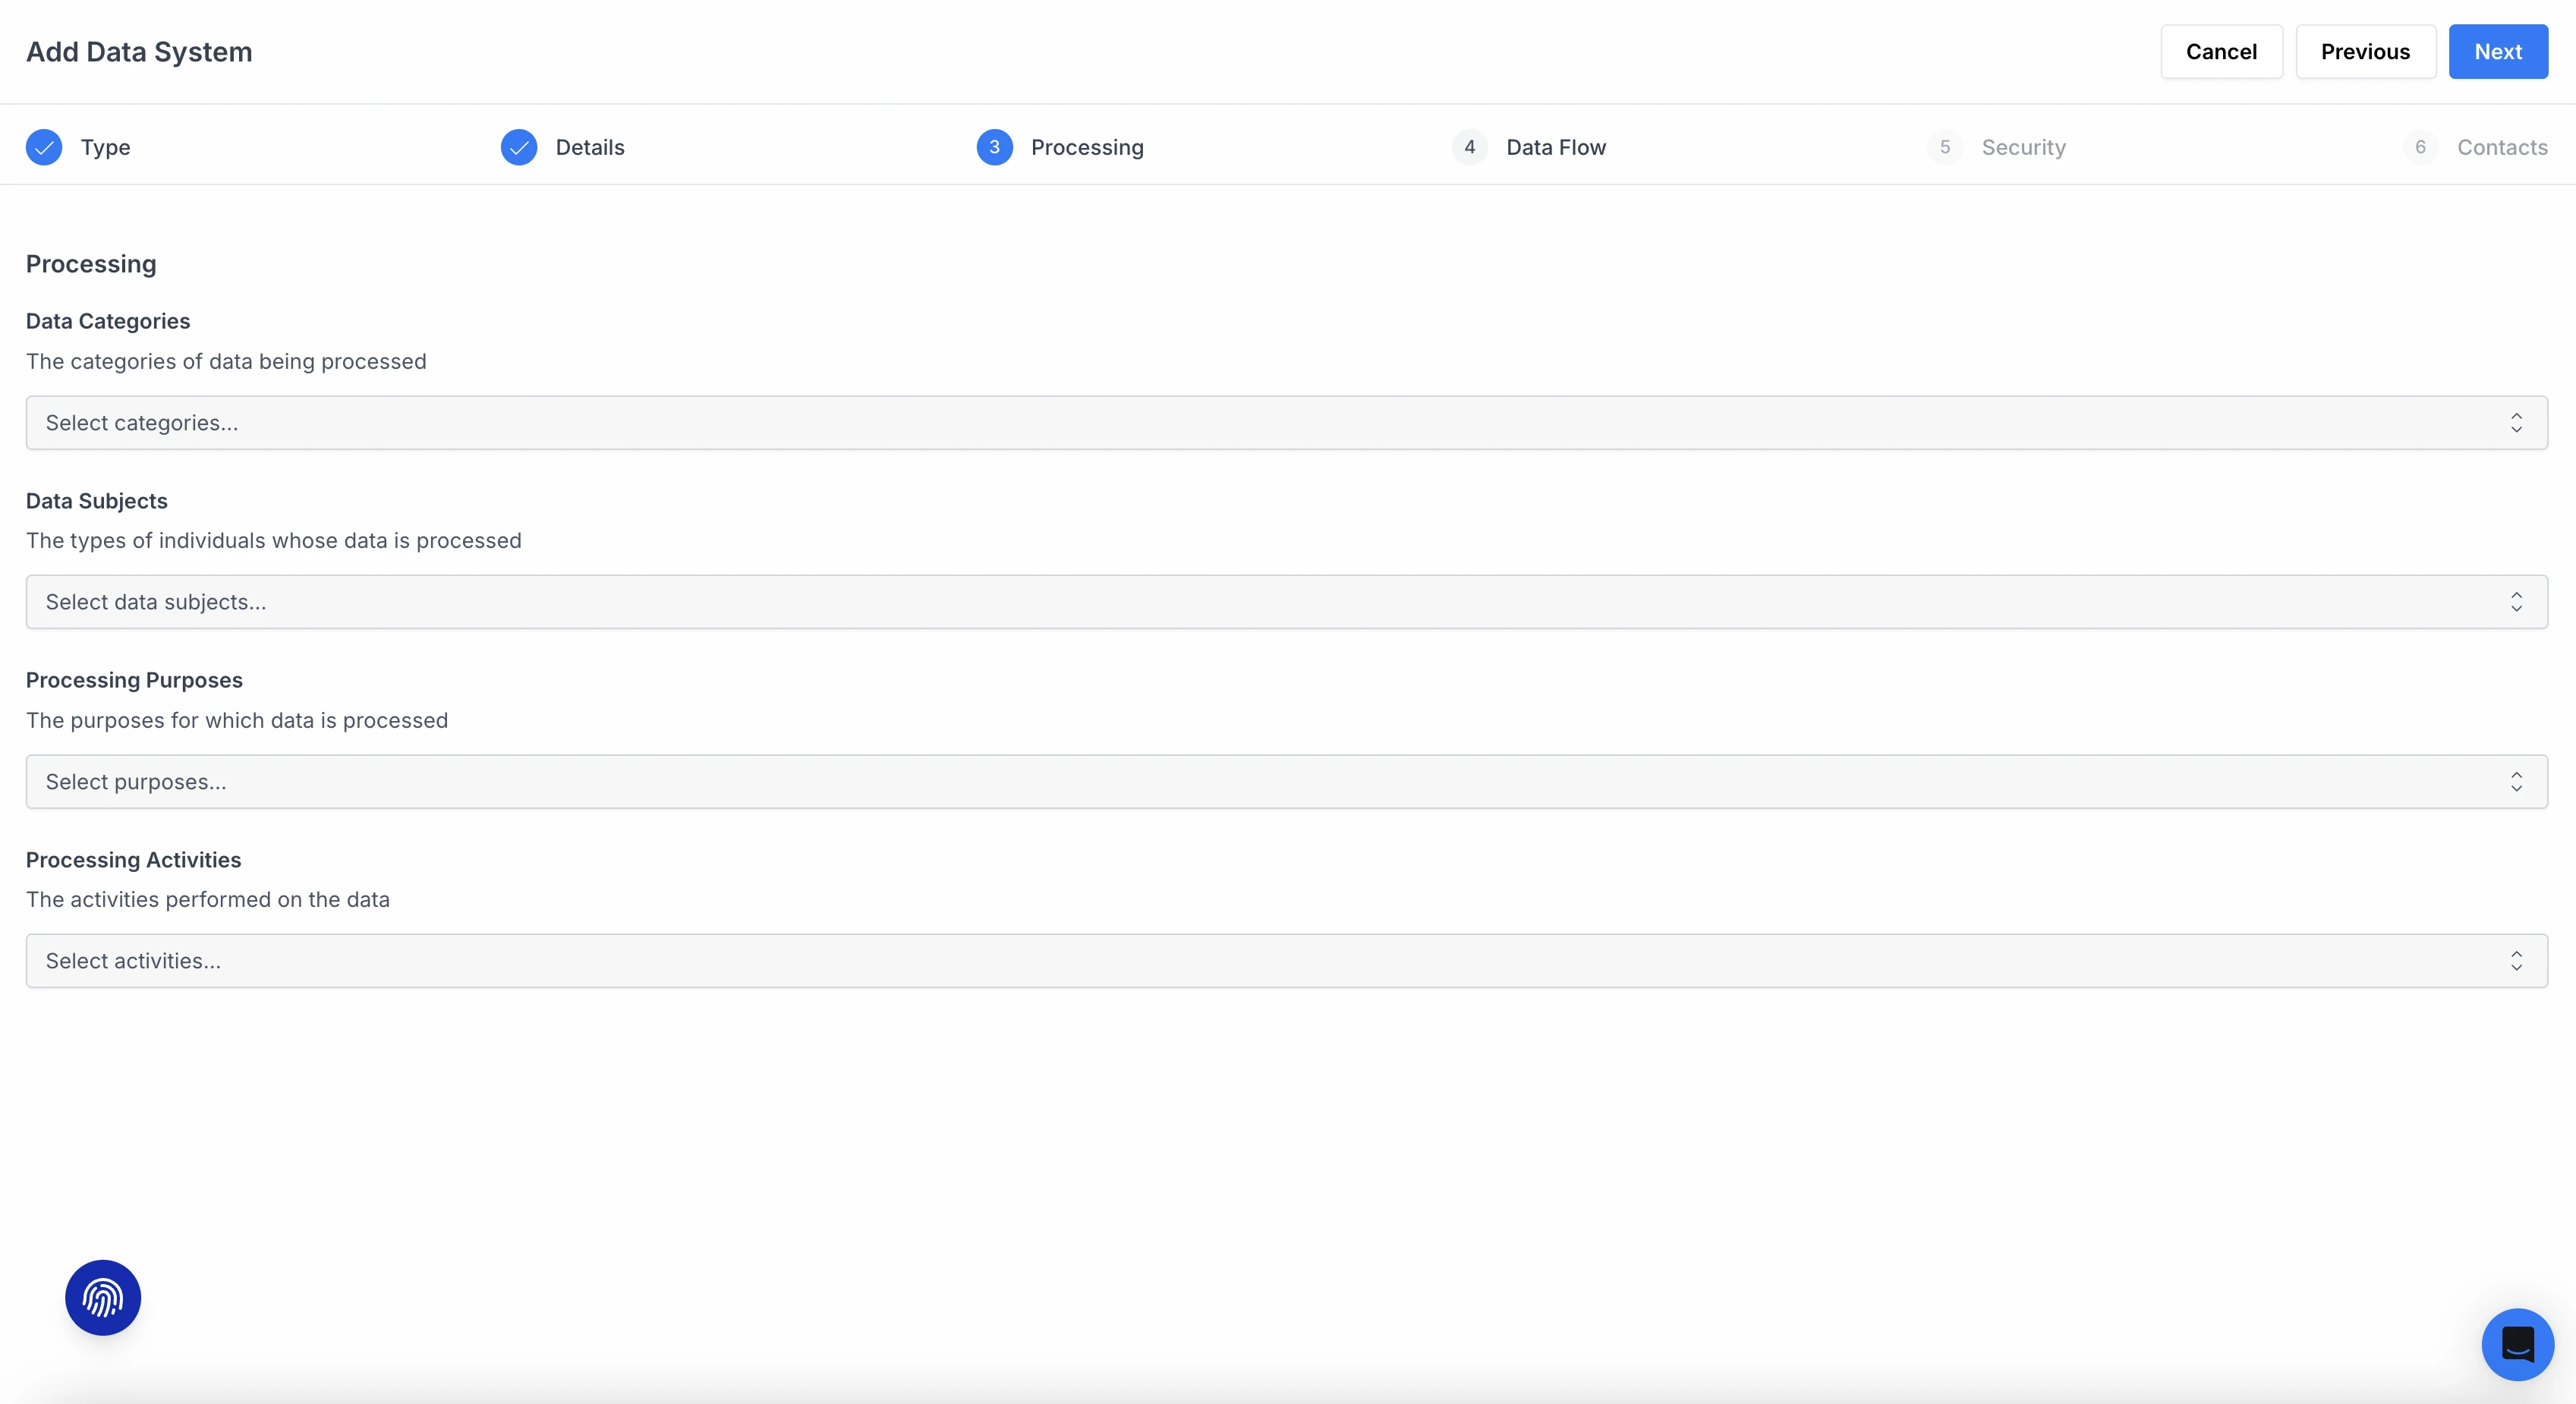
- Add Processing attributes (optional) and click Next:
- Data Categories: The categories of data being processed.
- Data Subjects: The types of individuals whose data is processed.
- Processing Purposes: The purposes for which data is processed.
- Processing Activities: The activities performed on the data.
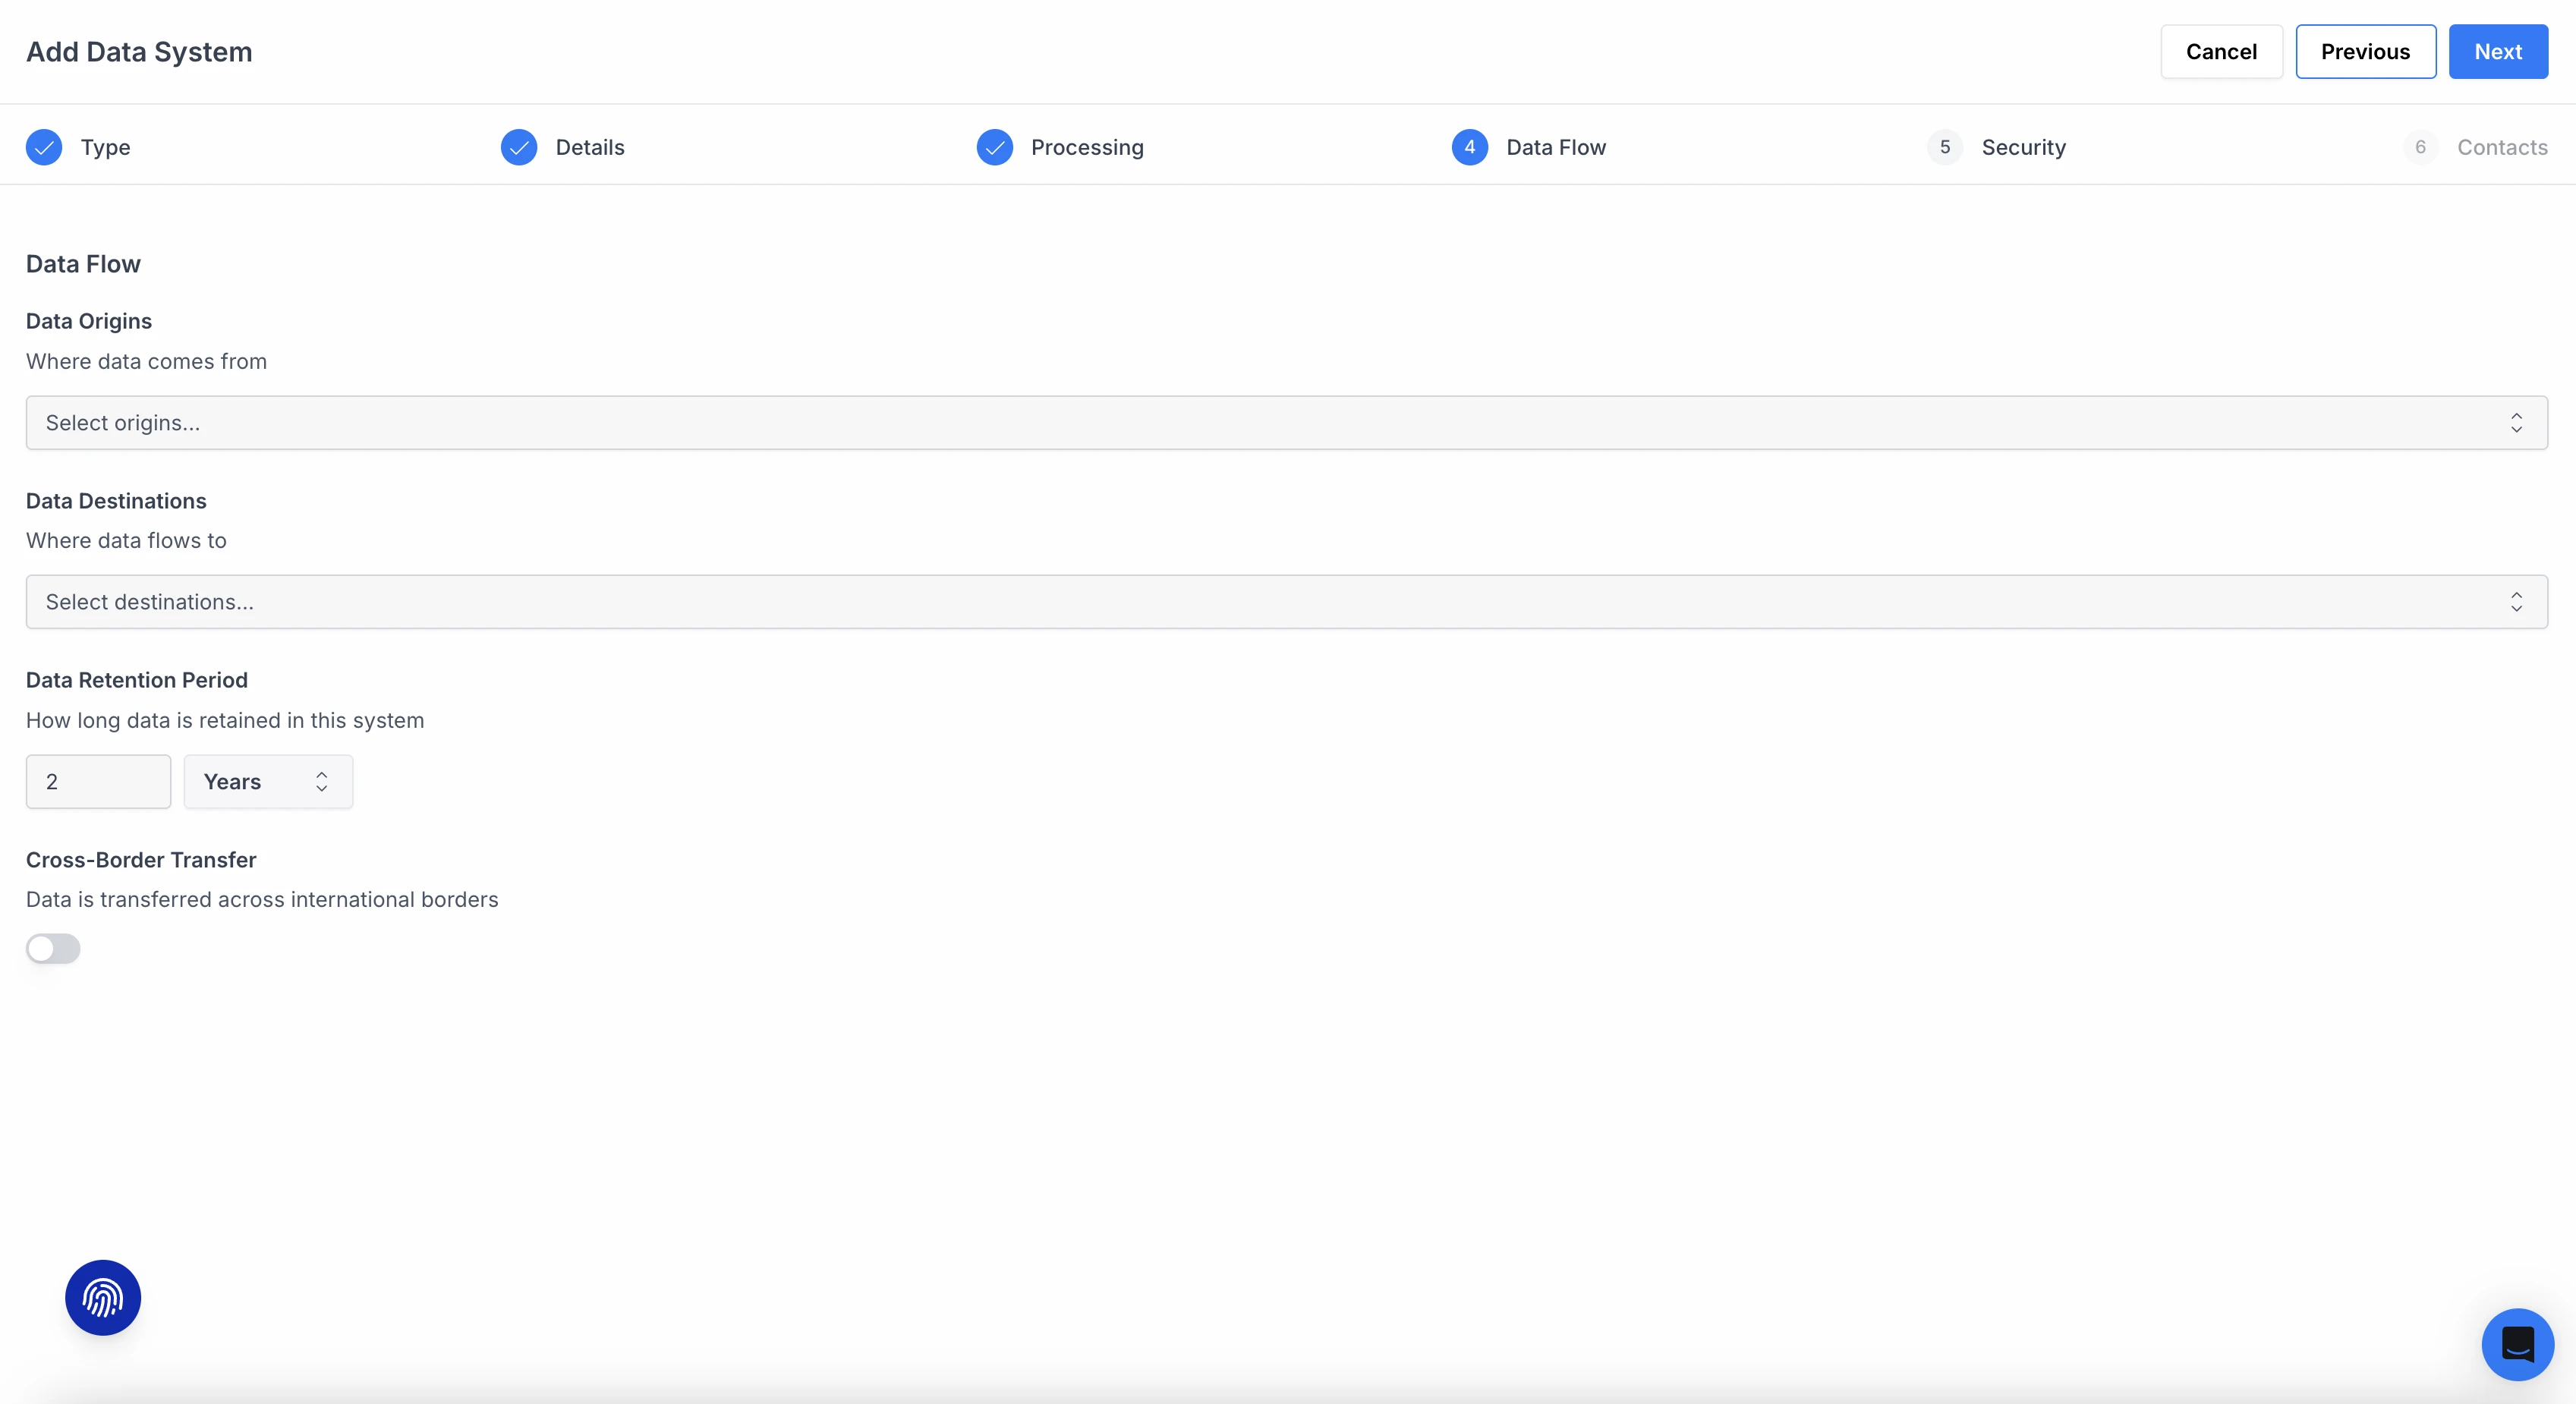
- Add Data Flow attributes (optional) and click Next:
- Data Origins: Where the data in this system originates from.
- Data Destinations: Where the data is sent to and who it is shared with.
- Data Retention Period: How long data is held in this system. The default is 12 months.
- Cross-Border Transfer: Whether data is transferred across international borders.
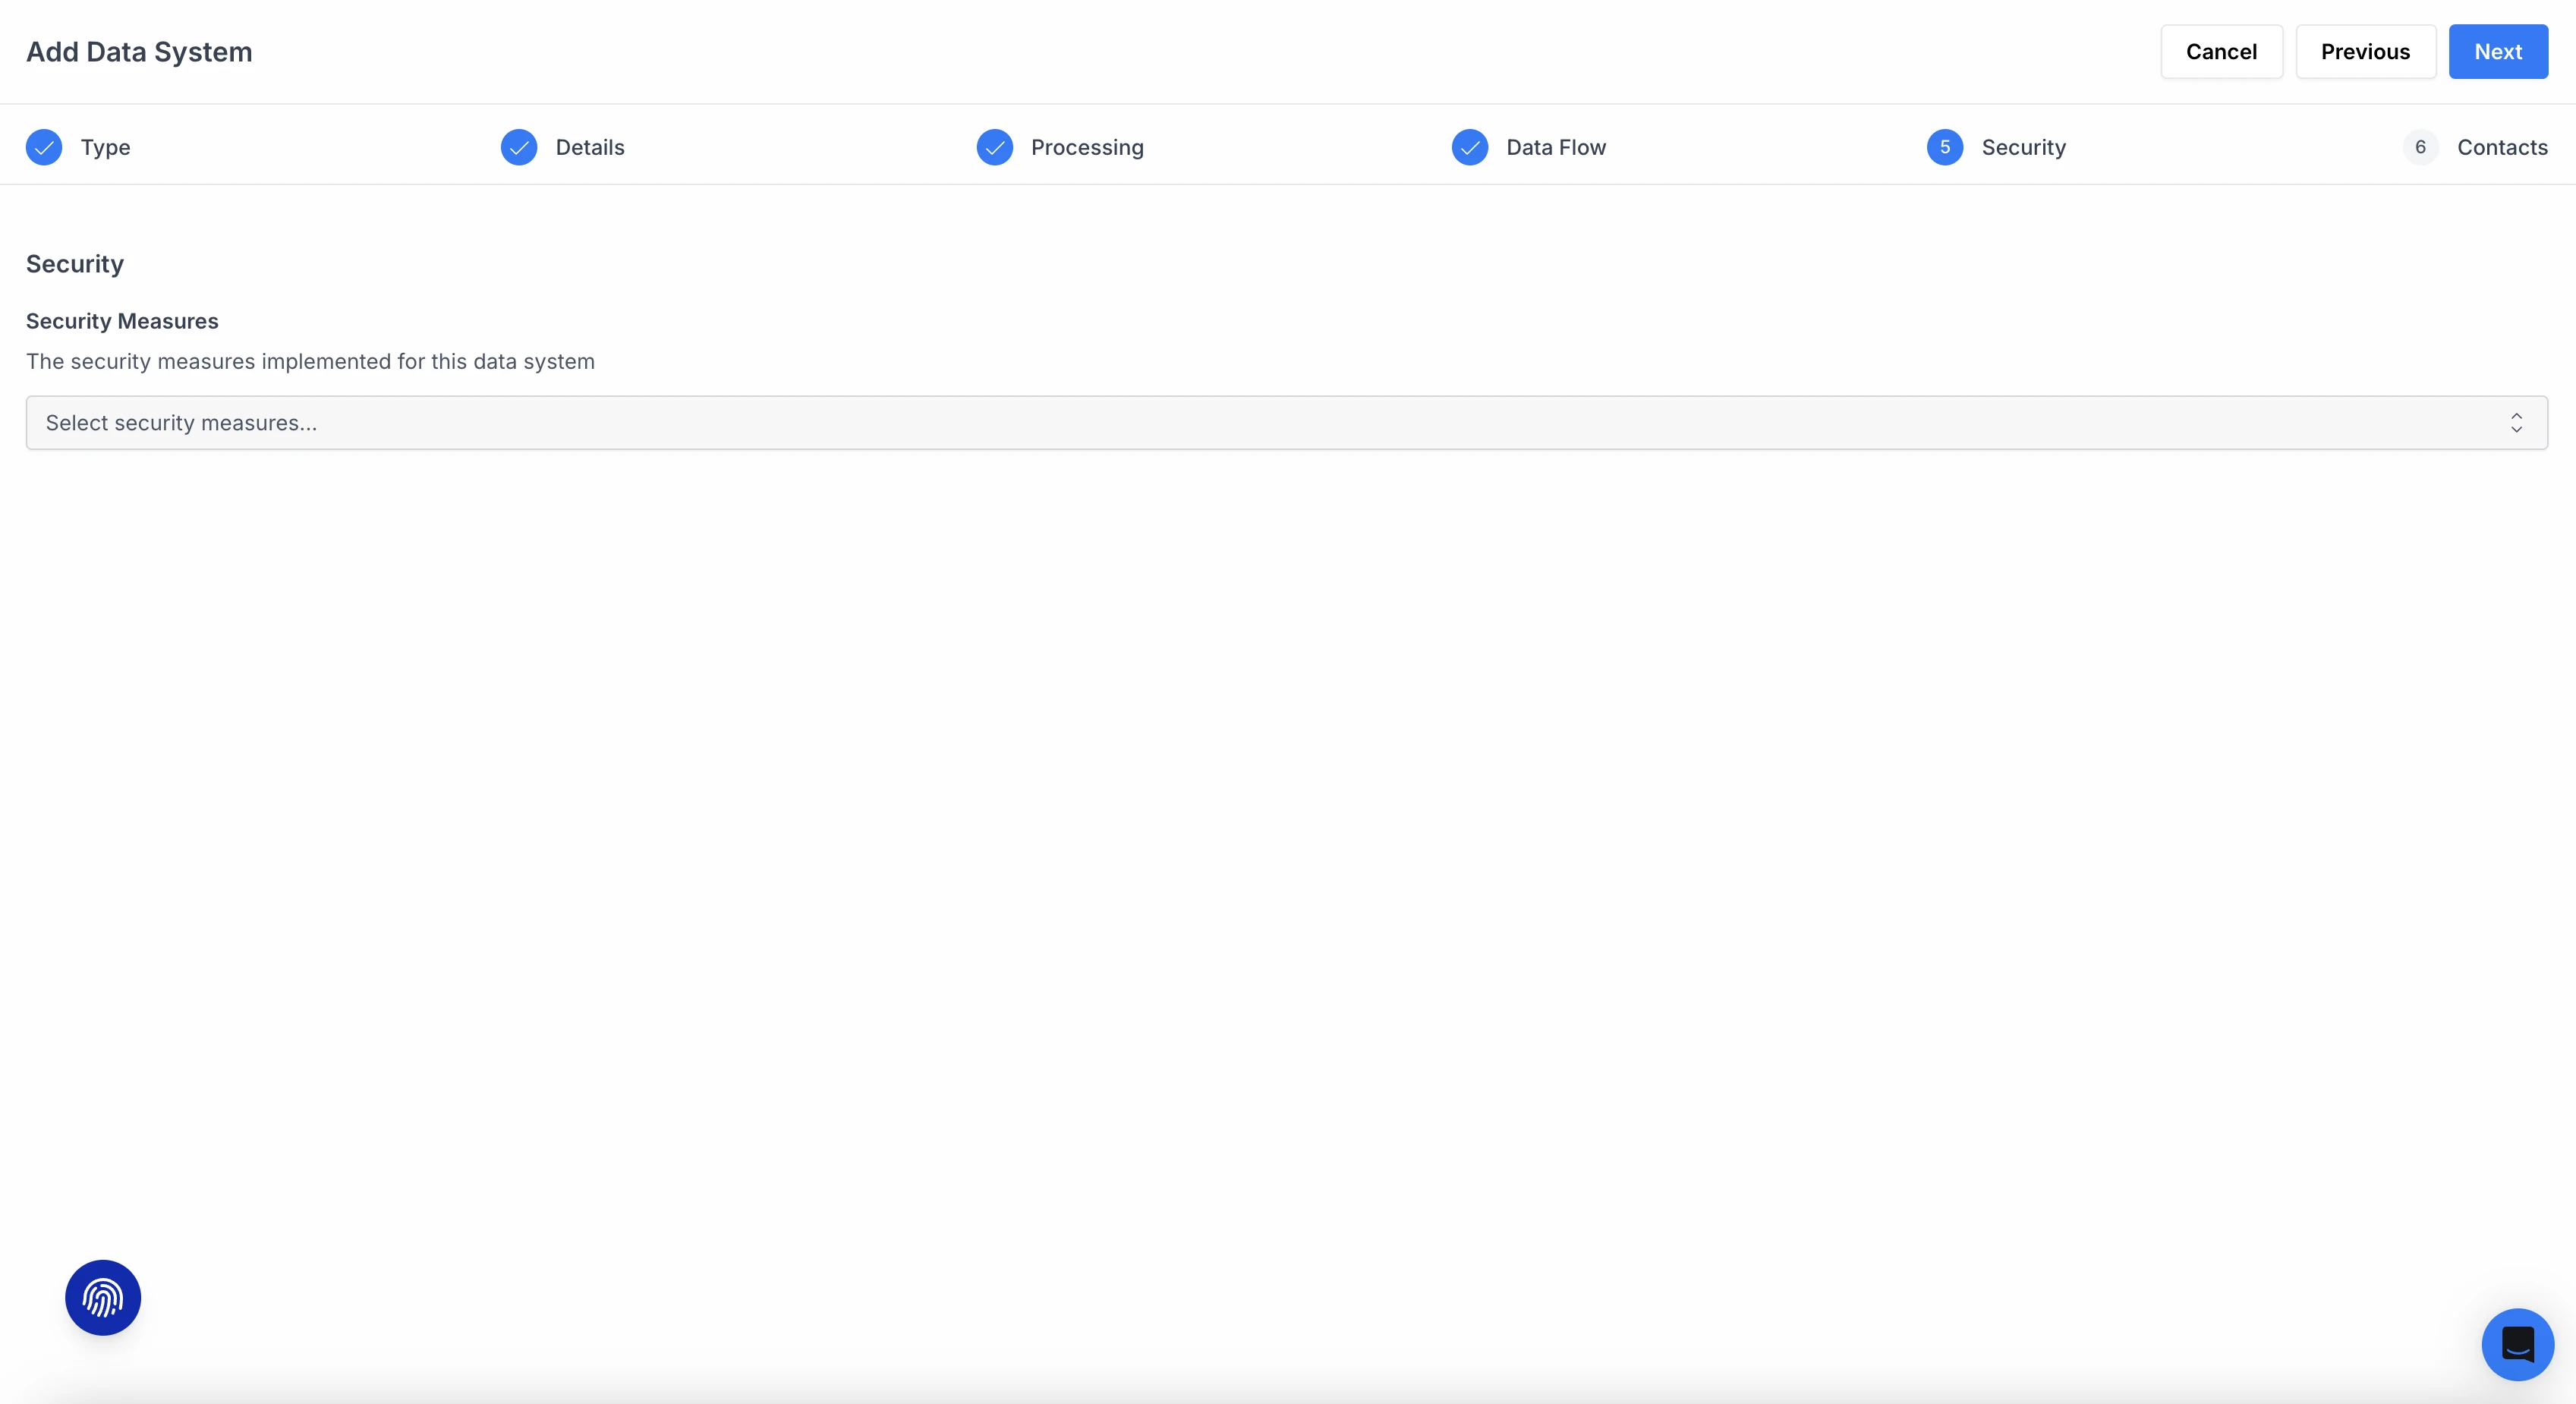
- Add Security measures (optional) and click Next:
- Security Measures: The security measures implemented for this data system such as audits, MFA, training, SOC 2 Compliance, etc.
- Add Contacts (optional) and click Done:
- Contacts: Select the contact(s) responsible for this data system.
The data system appears in the Systems table immediately.
Plans without Data Mapping: If your plan does not include Data Mapping, the Add Data System wizard has two steps: Type and Details. The Details step includes Name, Status, Relationship, and Additional Notes. The Projects field and the Processing, Data Flow, Security, and Contacts steps are not available.
Viewing a System's Detail Page
Click on a system name in the table to open its detail page.
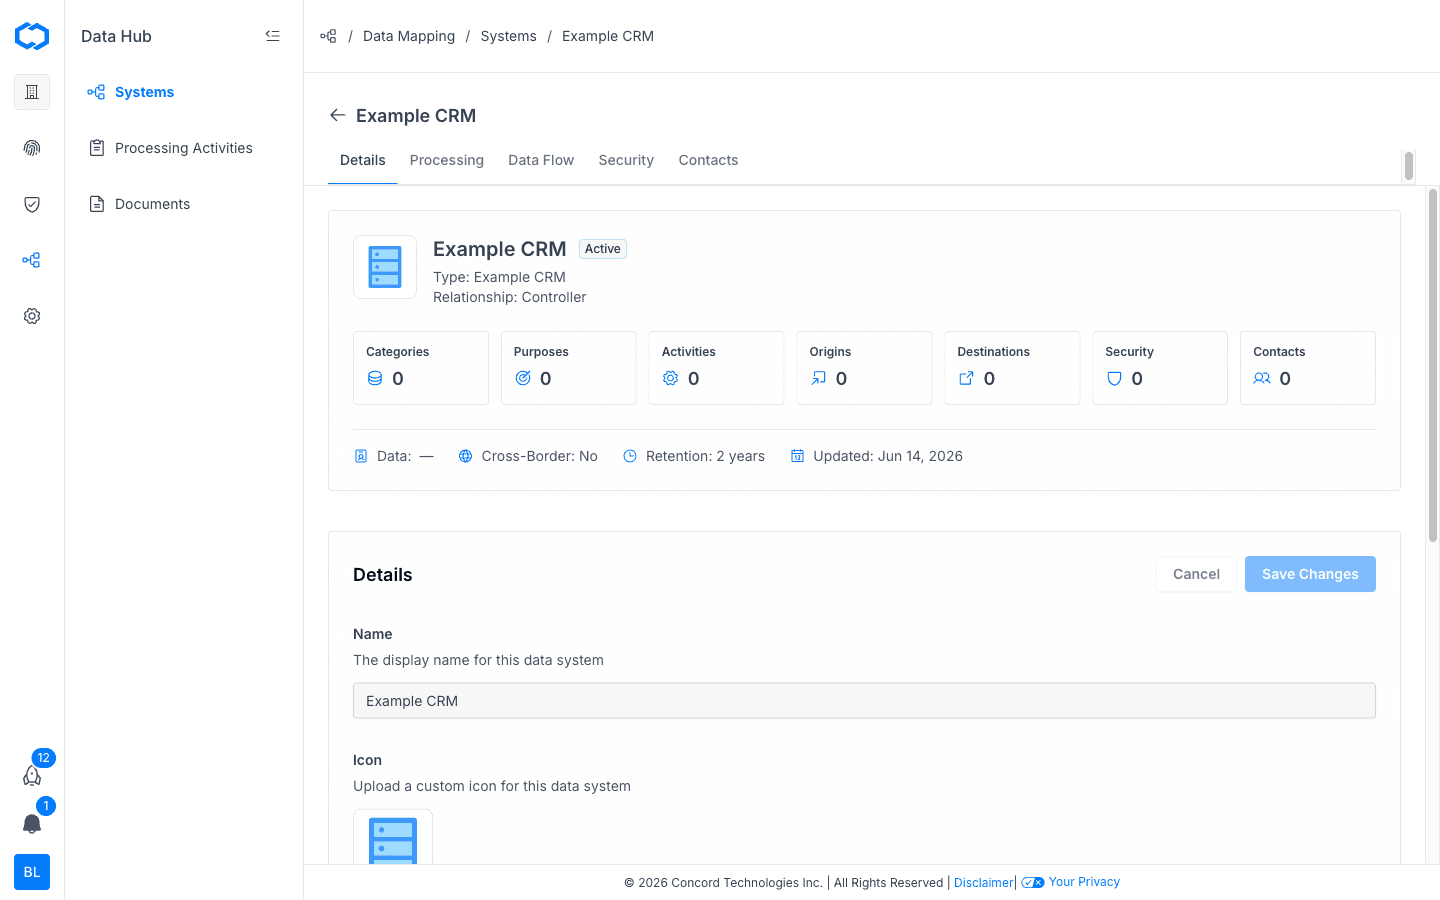
The detail page displays:
- The system name, type, status, and relationship at the top.
- Summary cards for Categories, Purposes, Activities, Origins, Destinations, Security, and Contacts.
- Metadata: data retention period, cross-border transfer status, and last updated date.
- Tabbed sections for Details, Processing, Data Flow, Security, and Contacts where you can edit each area.
Plans without Data Mapping: The detail page shows the Details tab with Name, Status, Relationship, and Additional Notes. The Processing, Data Flow, Security, and Contacts tabs and the summary cards are not displayed.
Editing a Data System
- Go to Data Hub > Systems.
- Find the system you want to update.
- Click the system name to open the detail view, or click the Actions menu (three dots) on the right side of the row and select Edit.
- Update the fields as needed and click Save Changes.
Archiving a Data System
Archiving removes a system from your active inventory without permanently deleting it. Use this when a system is no longer in use but you want to retain its history.
- Go to Data Hub > Systems.
- Click the Actions menu (three dots) for the system you want to archive.
- Select Archive.
Archived systems move to the Archived tab. You can restore an archived system at any time by going to the Archived tab, opening the Actions menu, and selecting Restore.
Deleting a Data System
Deleting a system permanently removes it from Concord. This action cannot be undone.
- Go to Data Hub > Systems.
- Click the Actions menu (three dots) for the system you want to delete.
- Select Delete and confirm the action.
If you are unsure whether you need the system record in the future, archive it instead of deleting it.
Connecting Data Systems to a Project
You can associate data systems with specific Concord projects from two places:
- From the Add Data System wizard or system detail page: Use the Projects field to select one or more projects. This field is available on plans that include Data Mapping.
- From Global Settings: Go to Global Settings > Projects, click the Actions menu for a project, and select Edit Project. Use the Data Systems selector to add or remove systems.